The aim of this course is to learn you, how write a simple application for Android and how to run it on your phone. To do that, we will develop with Kotlin language. If you know Java, everything will be easier with Kotlin.

We have a limited number of lesson hours. We will therefore quickly go over some concepts. If you want to go deeper, you will find more informations on https://developer.android.com/
The aim is to be able to develop a simple application to call a REST API developed in Java (Spring) to display building rooms and manage windows in these rooms. It is necessary to ventilate as much as possible rooms, but as winter approaches it will become important to heat the buildings to ensure user comfort. Windows should be open during and after classes, closed at night or in case of heavy rain or severe cold.
Android studio
Android studio is the tool we use to write Android code. You need to install it on your computer (installation requires 900MB) on https://developer.android.com/studio.
Installation
For a Linux installation you have to go in the installation directory (for me ~/appli) with a terminal and launch script launch.sh
cd ~/appli/android-studio/bin
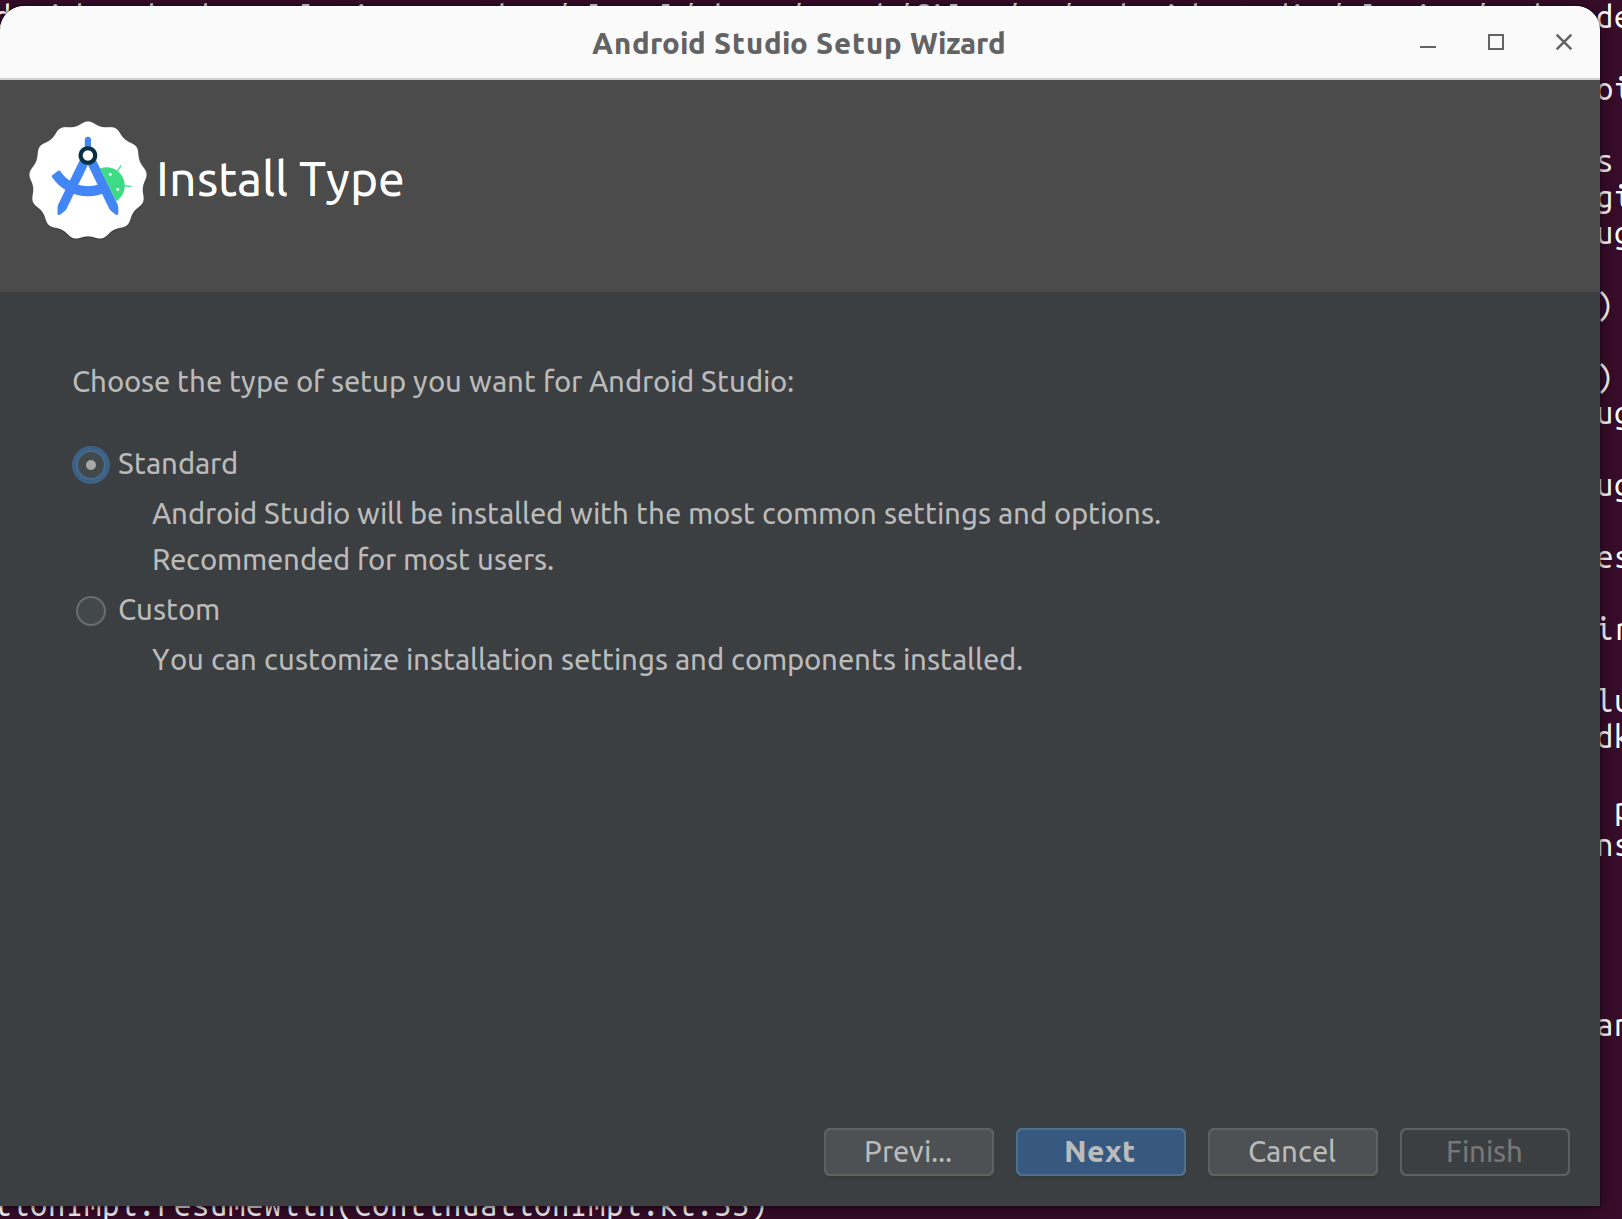
sh ./studio.shFollow the wizard and choose a standard installation. It’s important to do that to download the last version of Android SDK, recent images for Emulator…
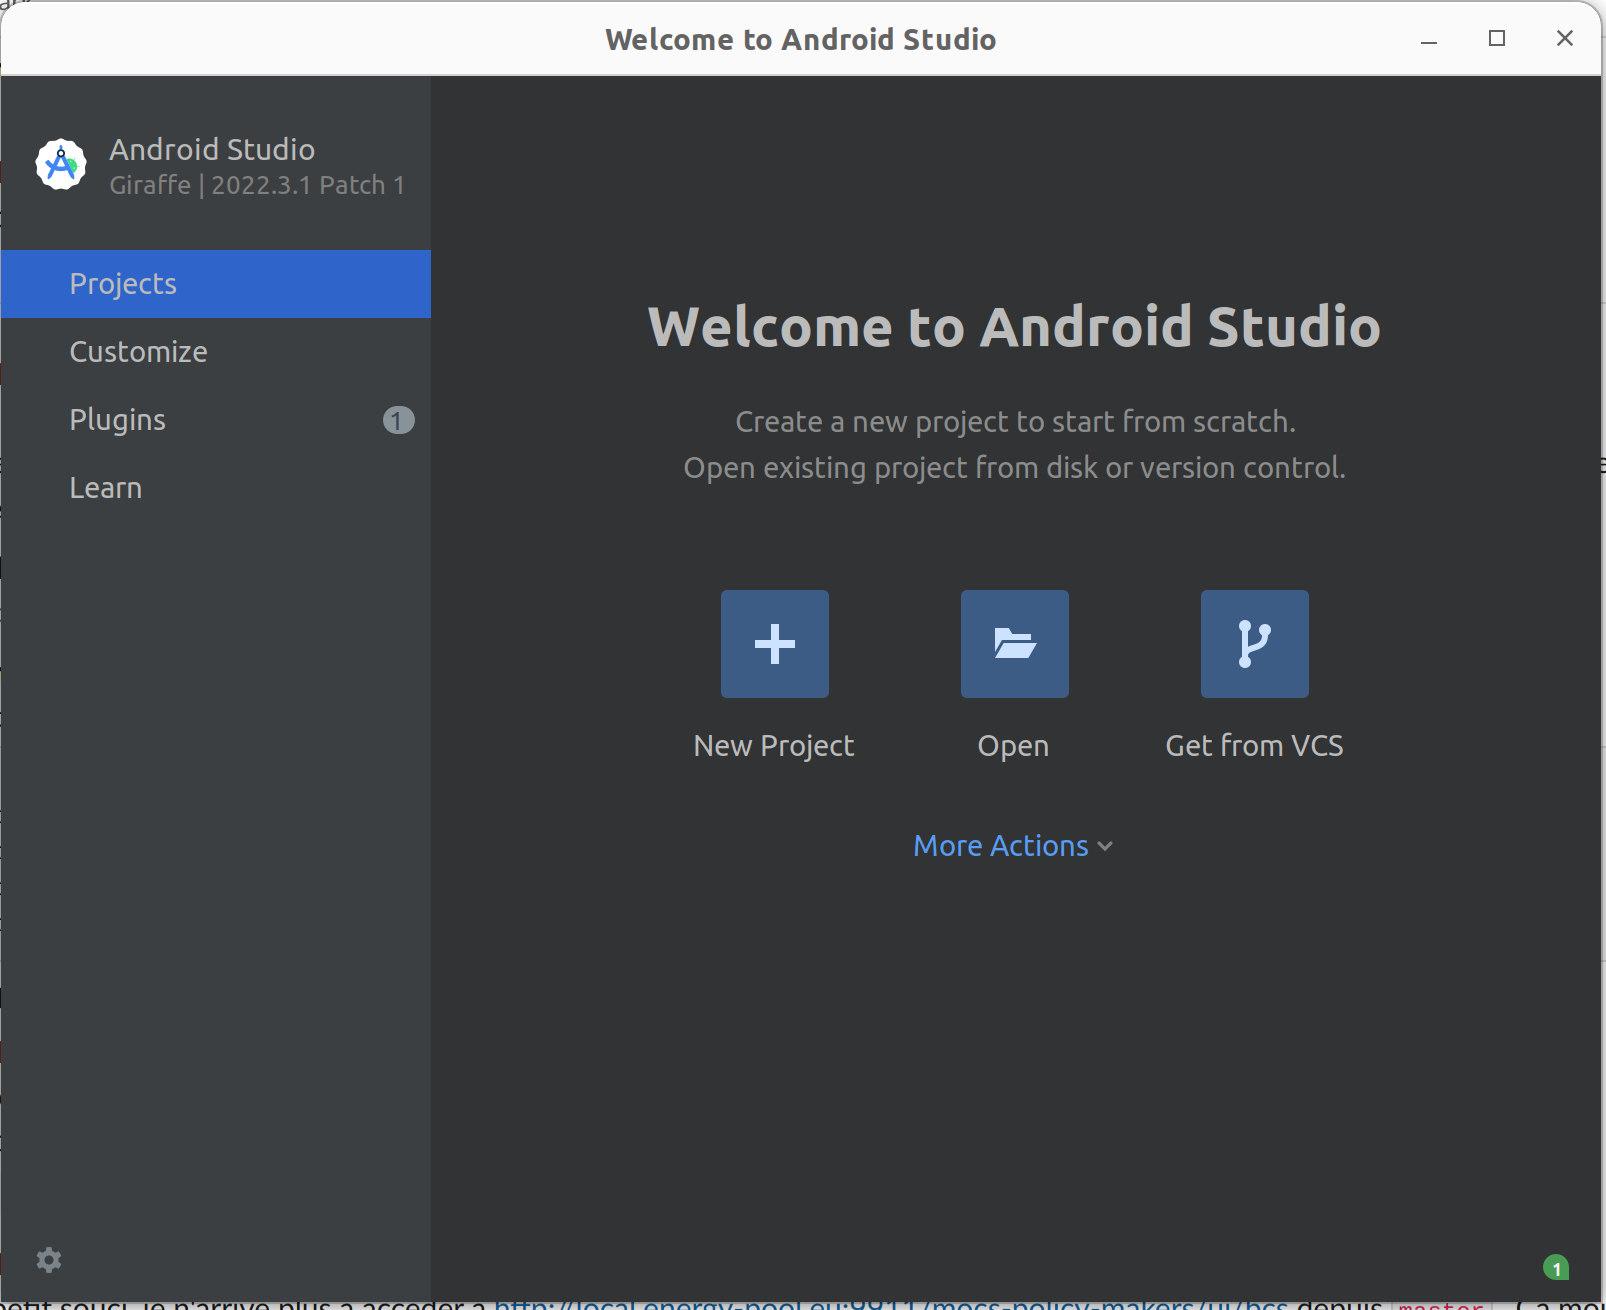
After the installation, you should have this screen
Update Android Studio
It’s always better to use the last version of Android Studio. To update it, you can go in the menu Help > Check for updates.
If a version is available, you can download it and install it.
Update Android SDK
If you already have a version of Android Studio on your laptop, you should update Android Sdk. For that go on menu Tools > SDK manager
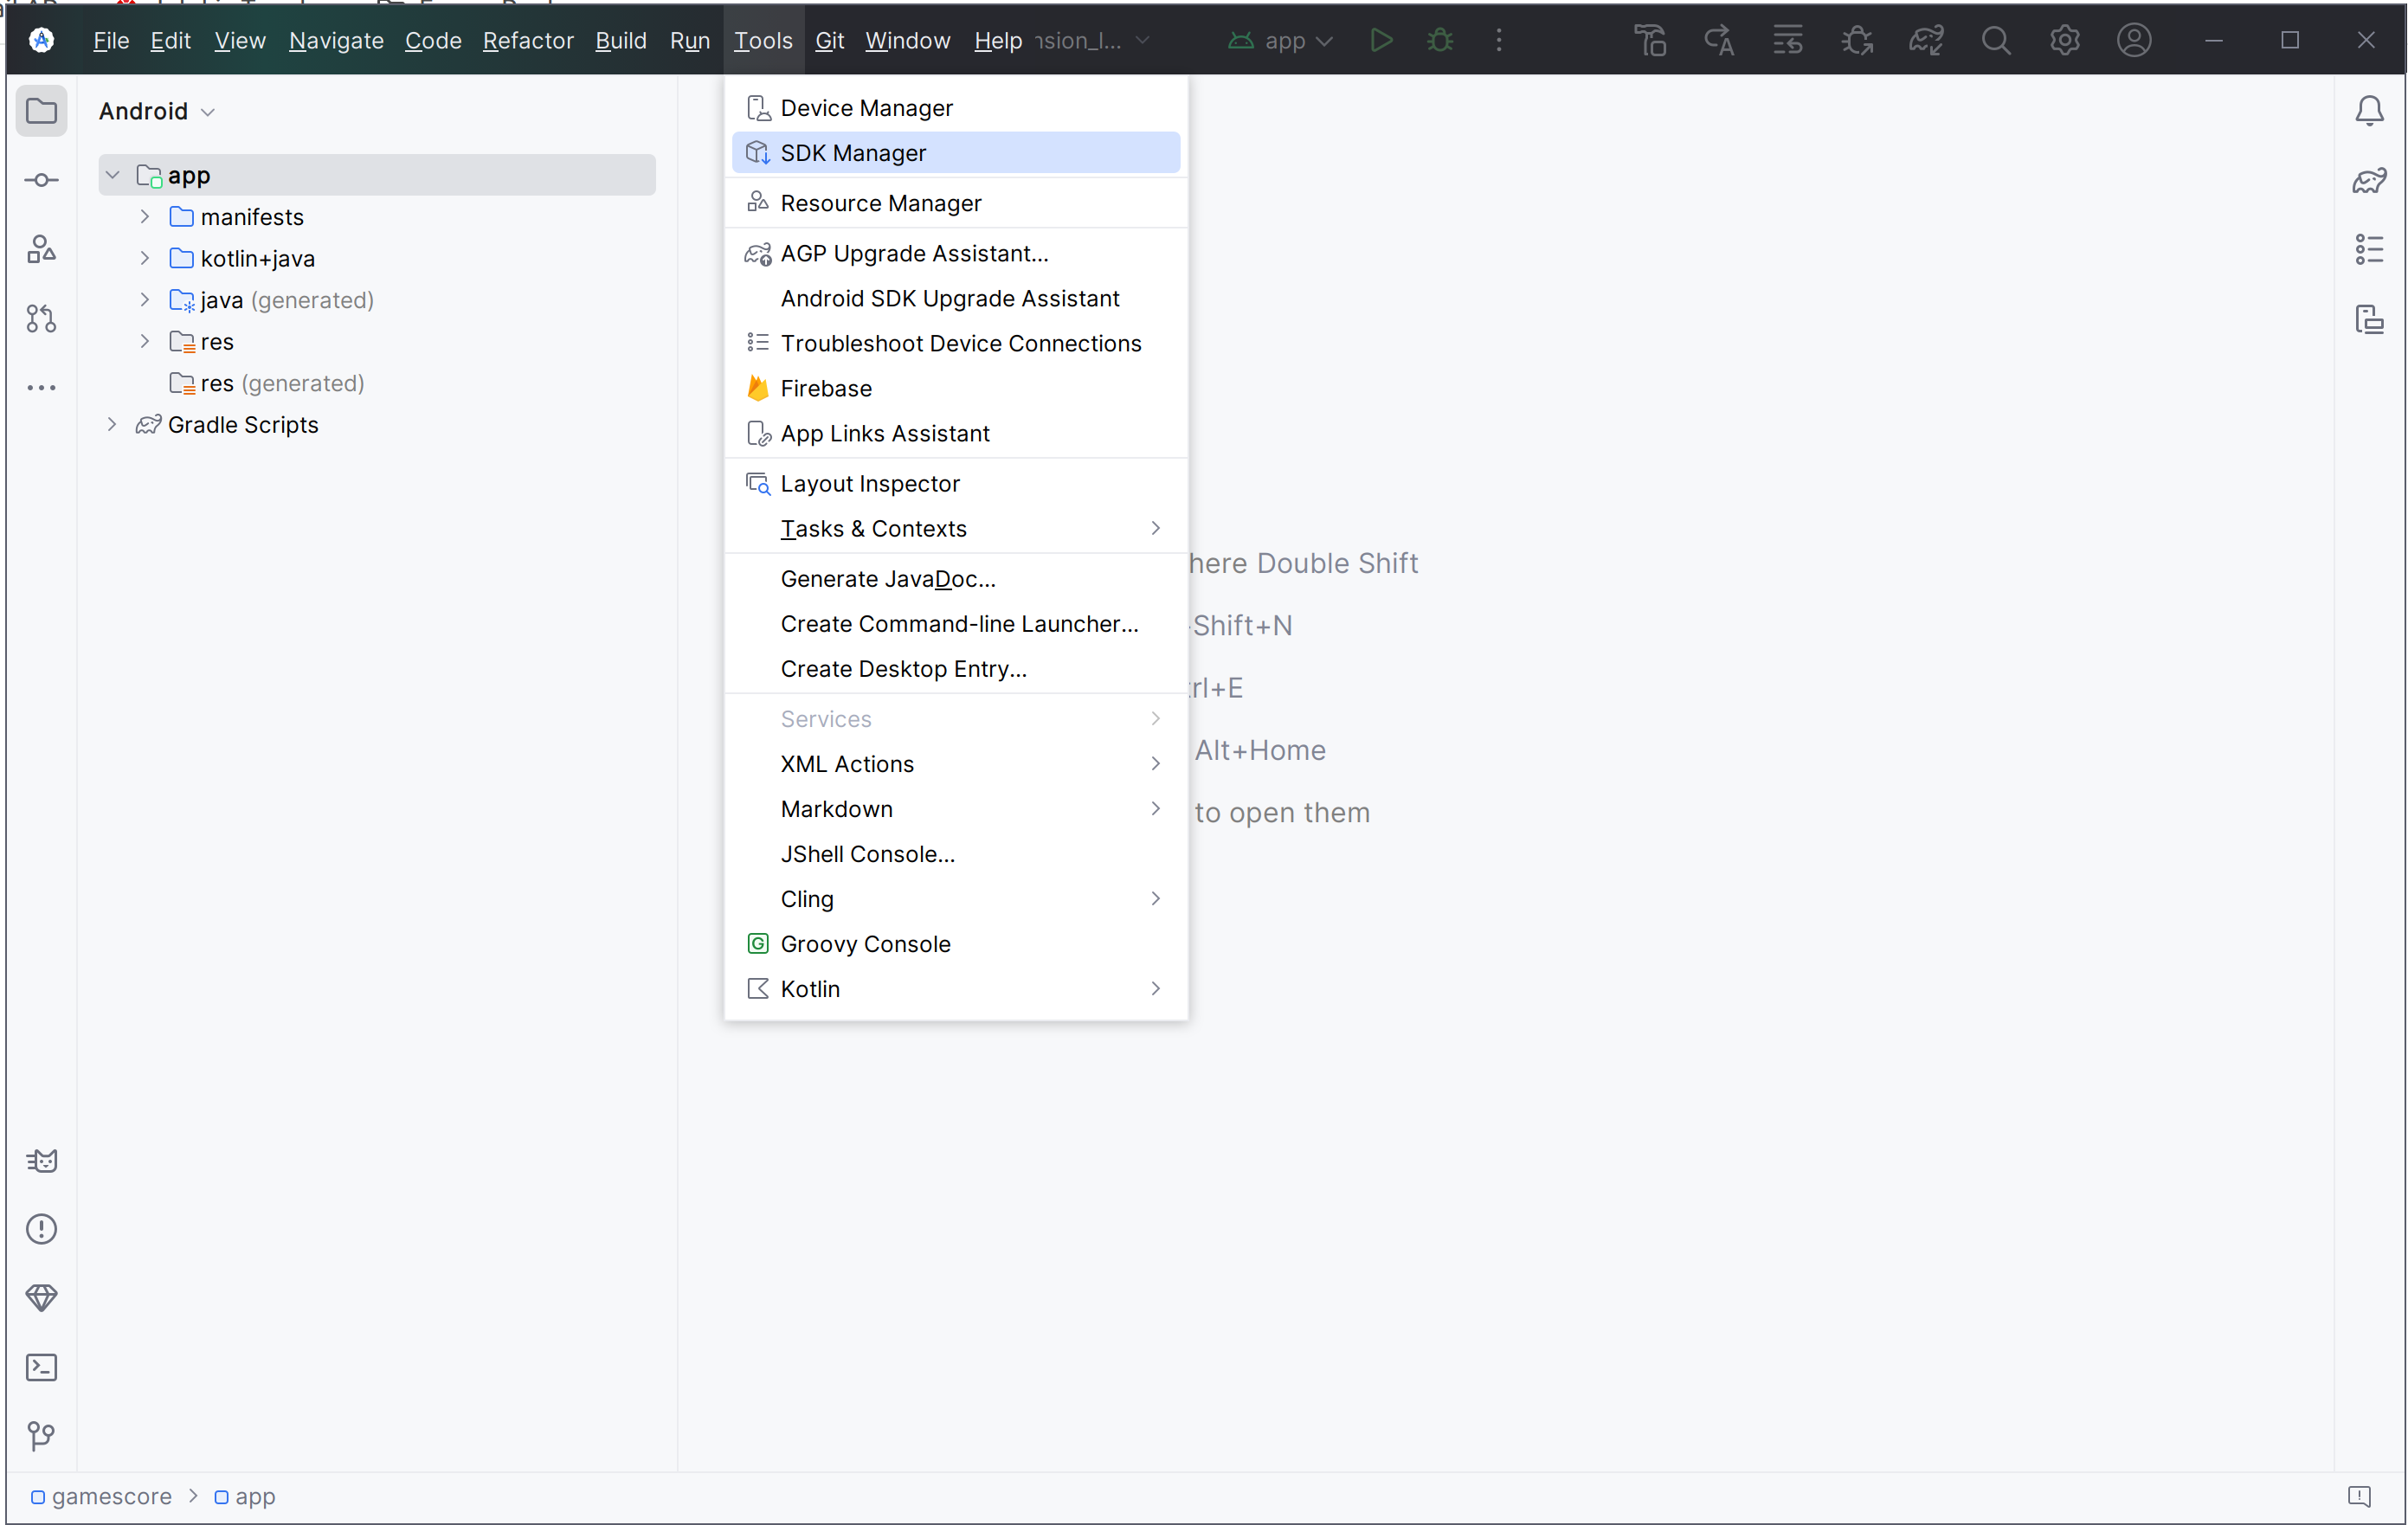
Below on my example, I choose to install the last version of the SDK, keep the version 14 and remove Android 13
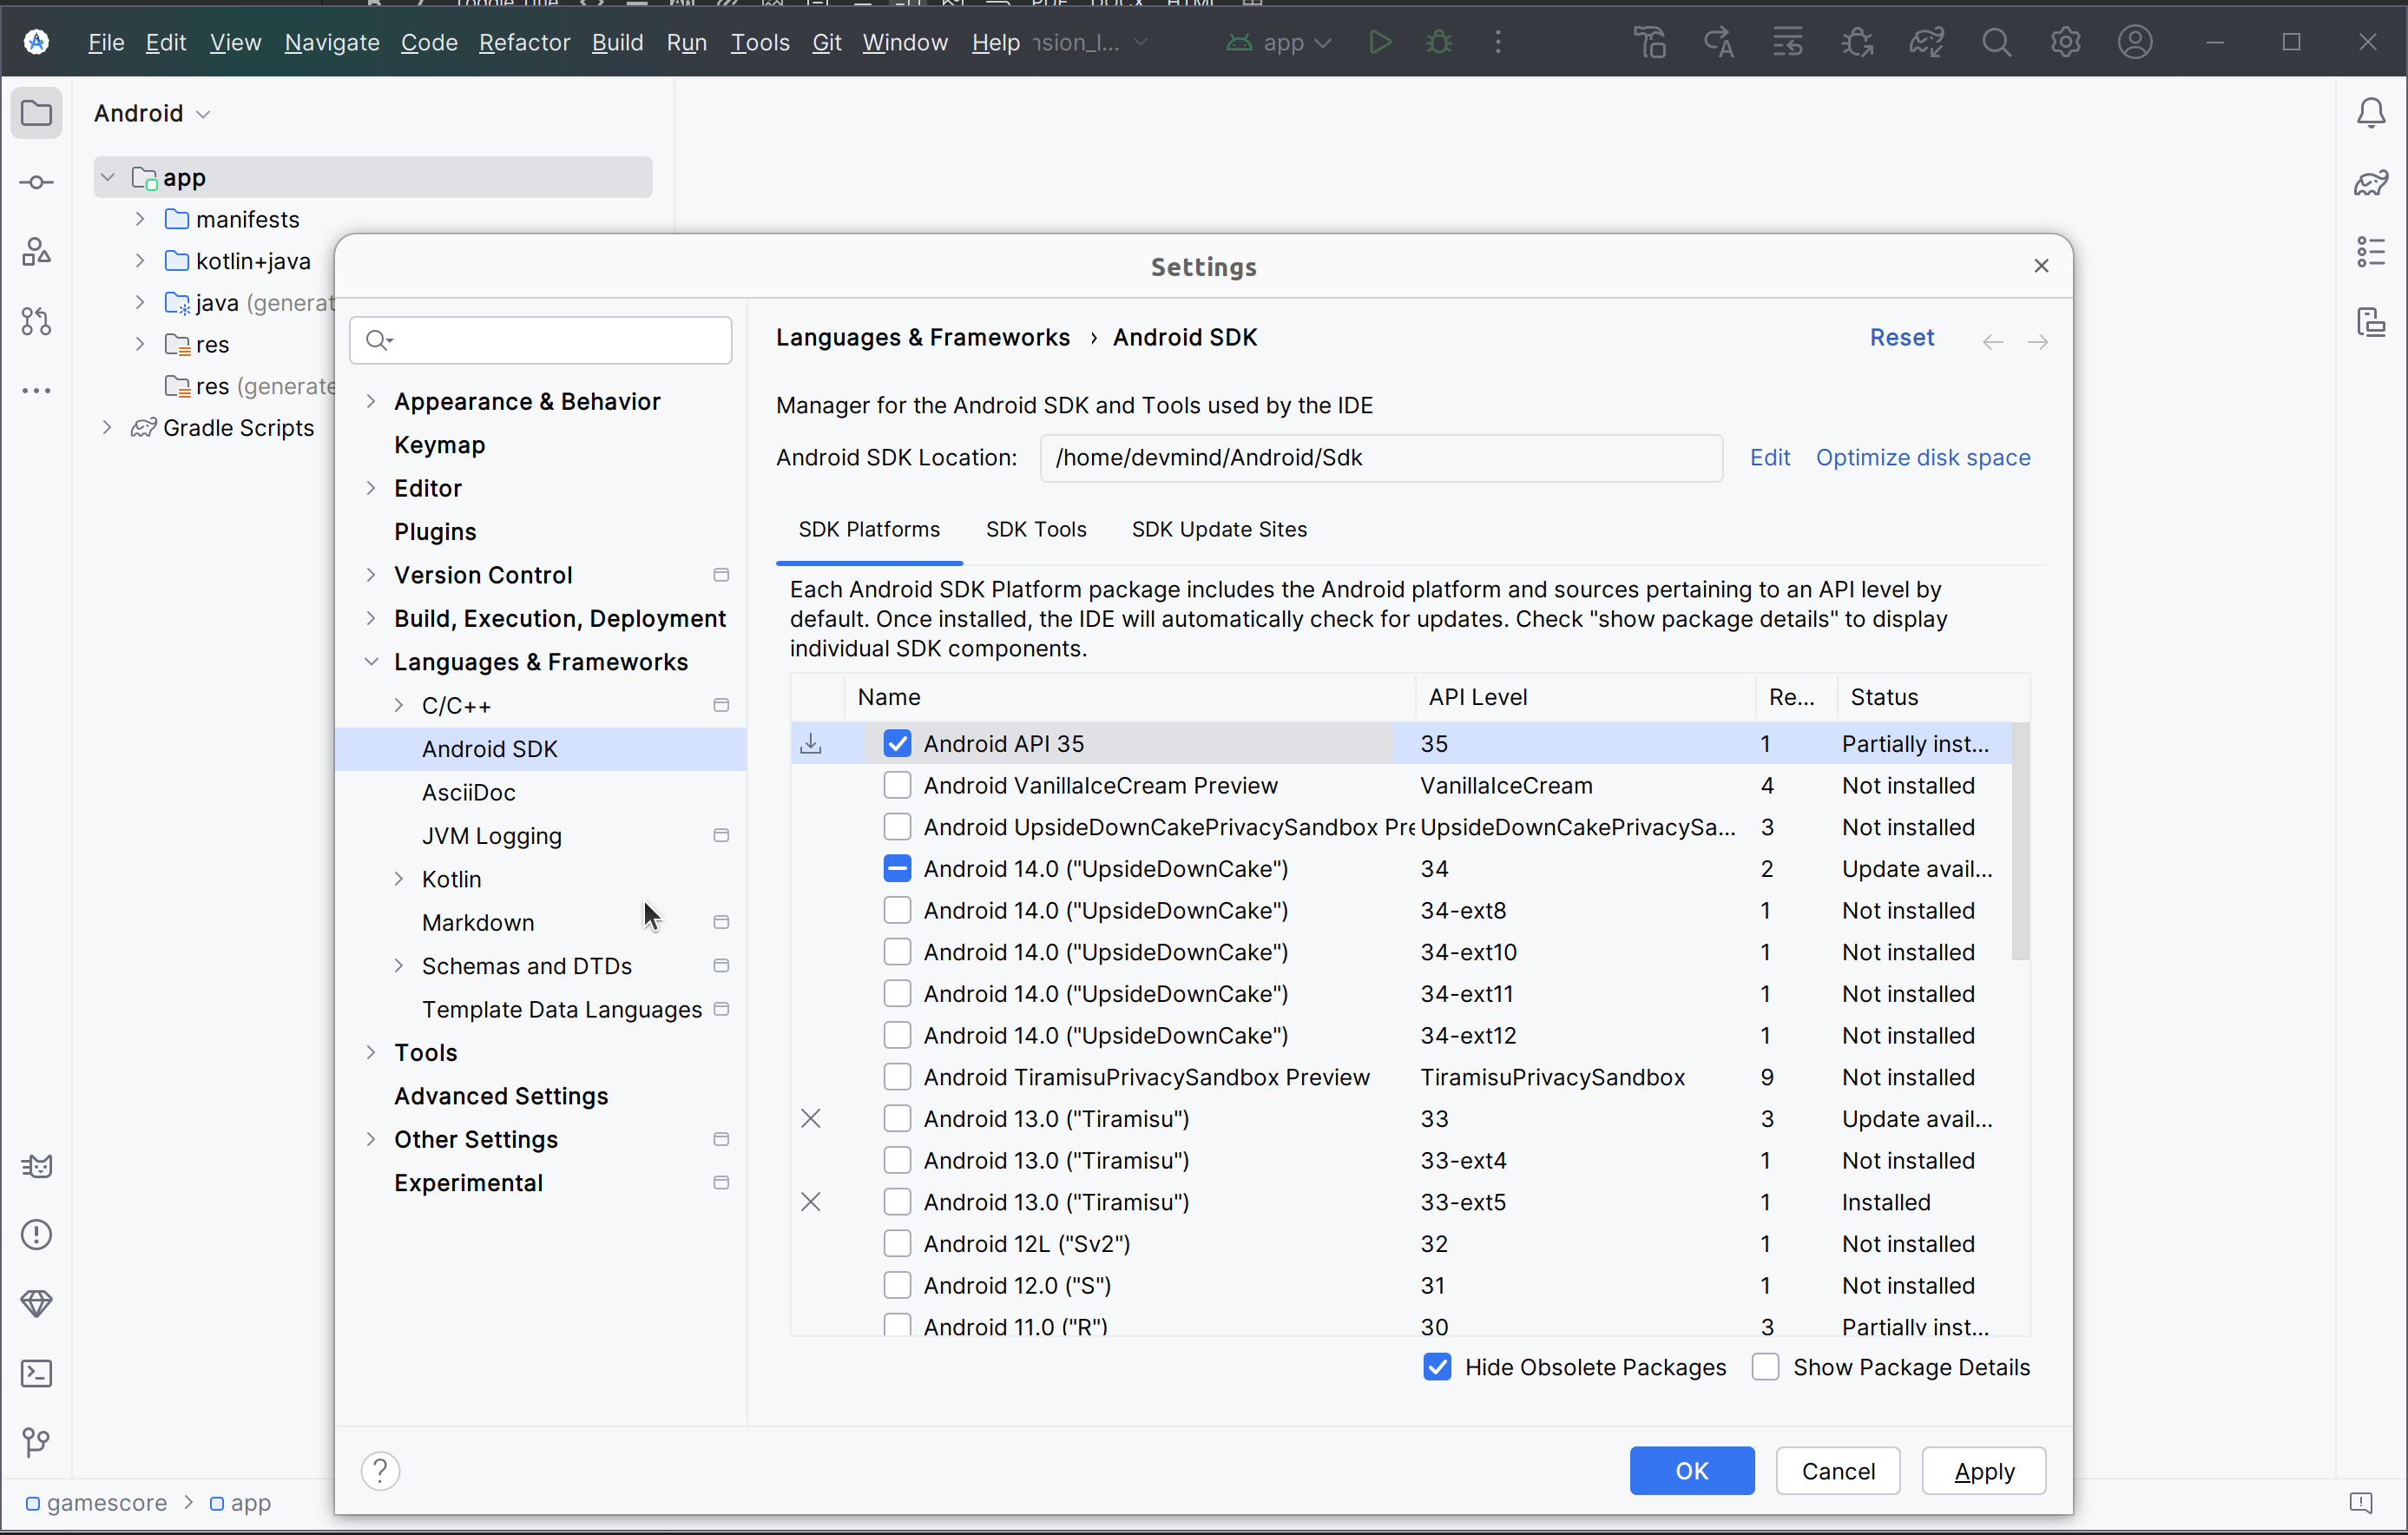
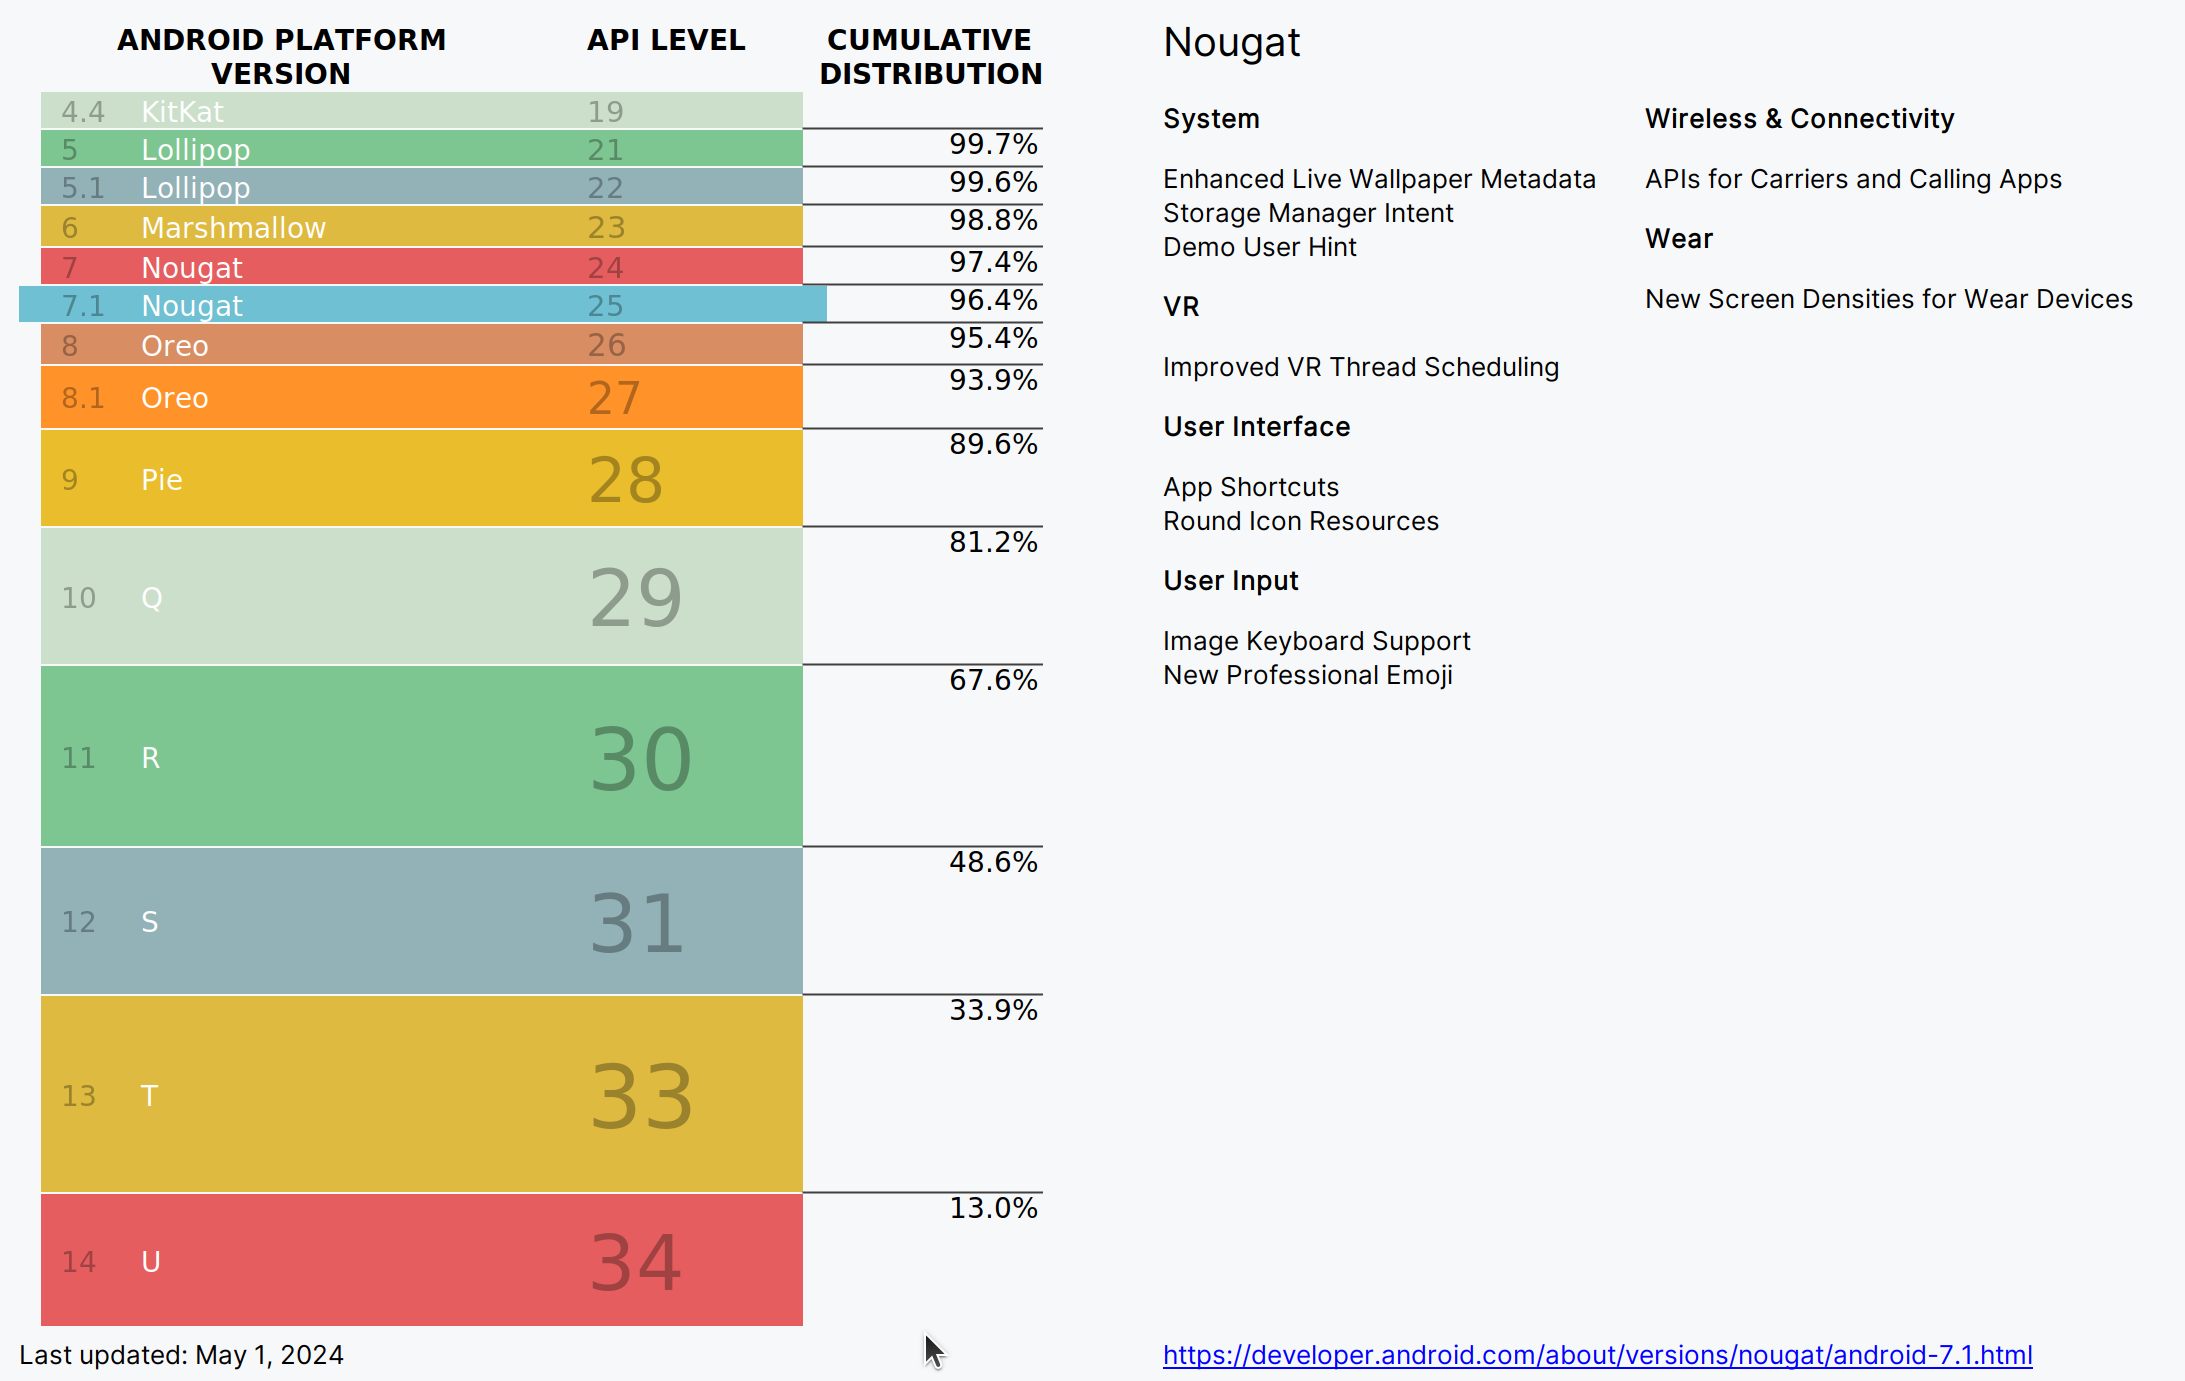
When you develop in Android you should always do it on the last SDK version. Google requires you to always target this latest version when you publish apps to the official store. In our case we have to target the VanillaCream version (API level 35)
Fundamental concepts
Android apps are built as a combination of components that can be invoked individually. We have several kind of components
-
Activity : an activity is the entry point for interacting with the user. It represents a single screen with a user interface
-
Service : a service is an entry point for keeping an app running in the background (app data synchronization, media player…)
-
Broadcast provider : A broadcast receiver is a component that enables the system to deliver events to the app (low battery, screen rotation, dark mode…).
-
Content provider : A content provider manages a shared set of app data that you can store in the file system, in a SQLite database, on the web, or on any other persistent storage location that your app can access.
In this course we will only manipulate activities.
After you will finish your first app, you can learn more about the other app components on the Google developper website.
Let’s focus on activities.
When you click on your app’s icon on your phone, you will launch the "main" activity. This activity is often your home activity from which you will launch other activities.
An activity interact with an XML resource file where your view content is defined. Android allows you to provide different resources for different devices. For example, you can create different layouts for different screen sizes. The system determines which layout to use based on the screen size of the current device.
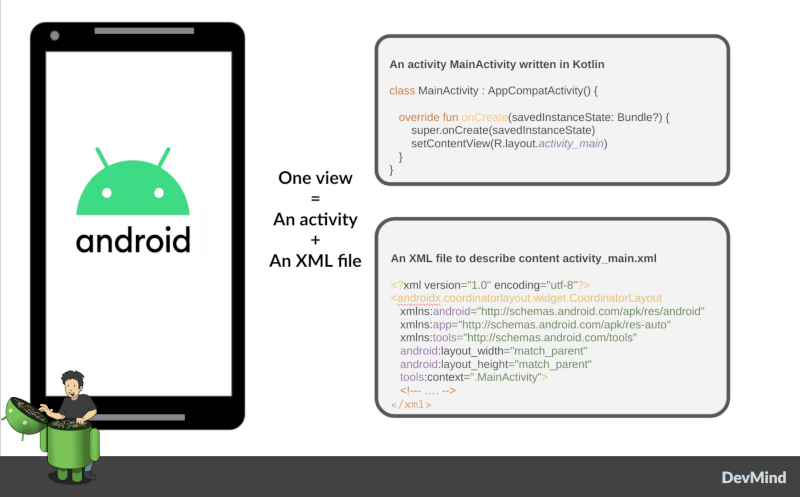
Note that there is also another important concept in Android development with the fragments. A Fragment represents a reusable portion of your app’s UI. A fragment defines and manages its own layout, has its own lifecycle, and can handle its own input events. Fragments can’t live on their own. They must be hosted by an activity.
Another remark, today you can always write your screen interface in an XML file. But you can also do this job in Kotlin with the Jetpack Compose library. This library is a modern toolkit for building native Android UI. It simplifies and accelerates UI development on Android.

 : A first example with Jetpack compose
In this lab, you will learn how create a new Android project with Android Studio
-
Launch Android Studio. If you need to install it see you on the first chapter
-
In the Welcome to Android Studio window, click Start a new Android Studio project. If you have a project already opened, select File > New > New Project.

-
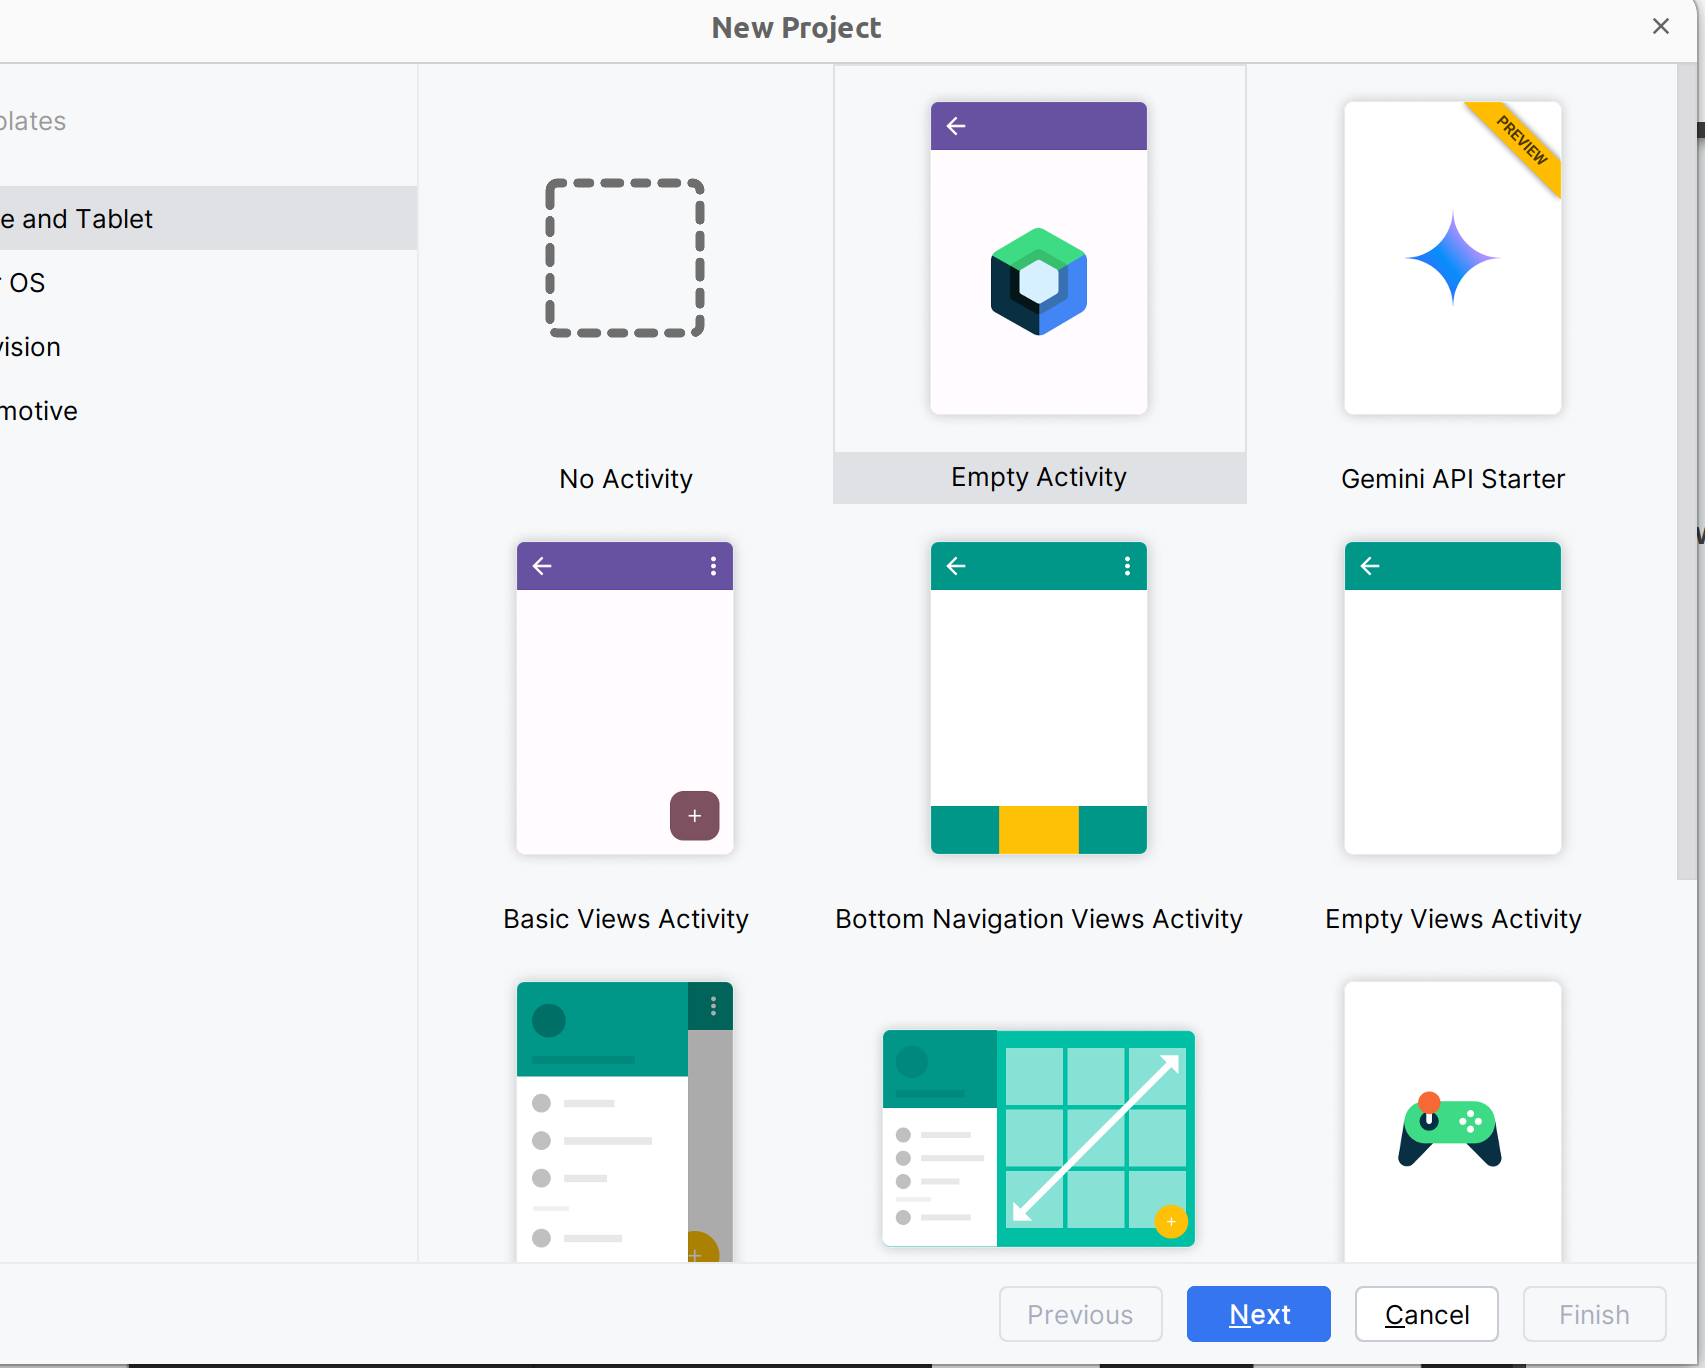
Android Studio will initialize a new project with an activity. It asks you to select a template for this activity. In the Select a Project Template window, select Empty Activity (in JetPack compose) and click Next.
-
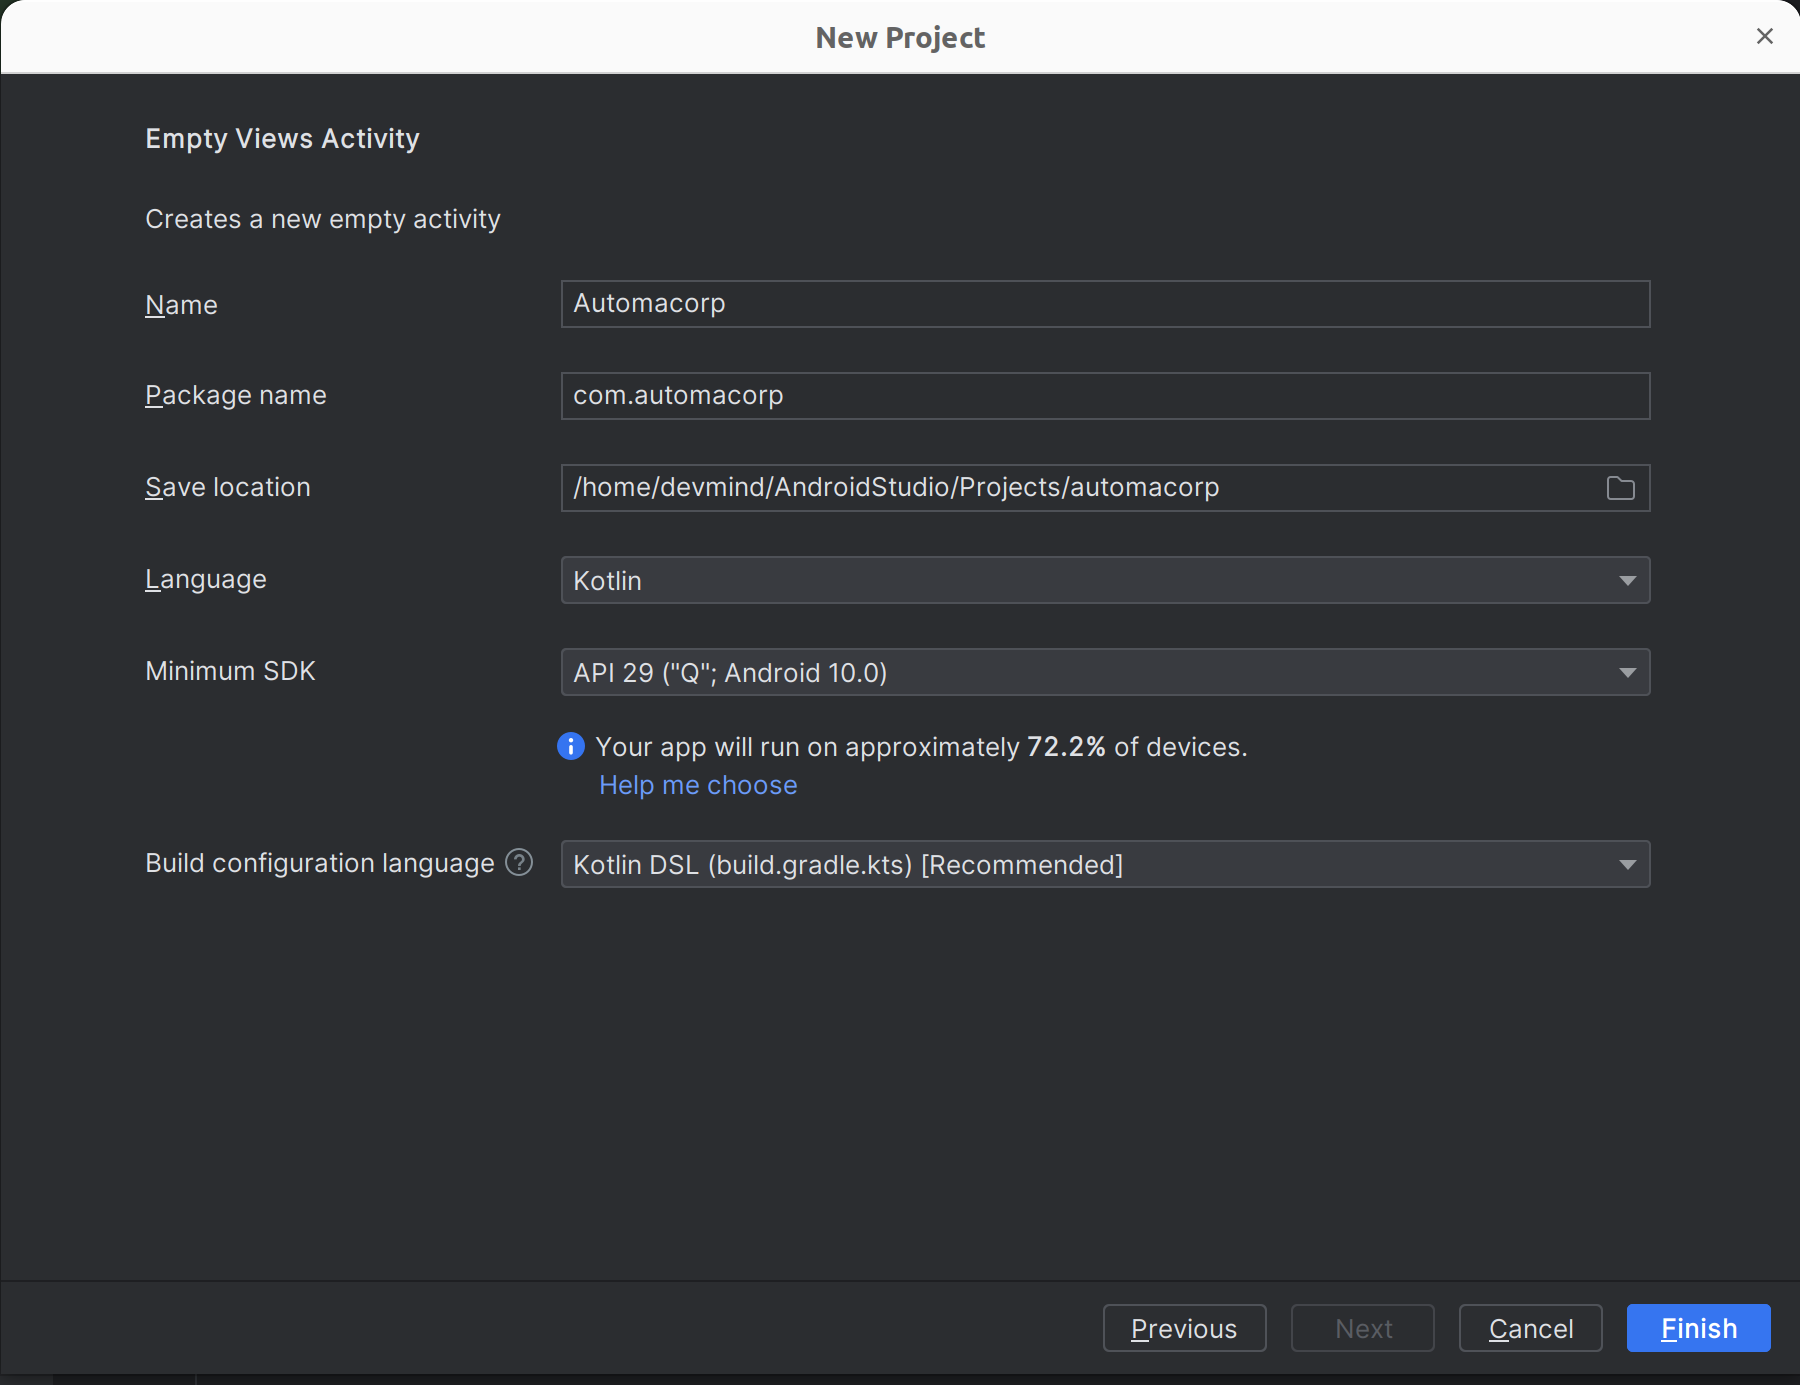
In the next wizard window, you have to define the app name and the language
-
Enter automacorp in the Name field.
-
Enter com.automacorp in the Package name field.
-
If you’d like to place the project in a different folder, change its Save location.
-
Select Kotlin from the Language drop-down menu.
-
Select the lowest version of Android your app will support in the Minimum SDK field. A message indicates you on how many device your app will be available. If you want to target more devices you can select a lower API version. If you want to use last Android features you can select higher version. You can click on Help me choose link to select the good API version
-
-
Click on Finish button.
After some processing time for code generation, the project appears in Android Studio.
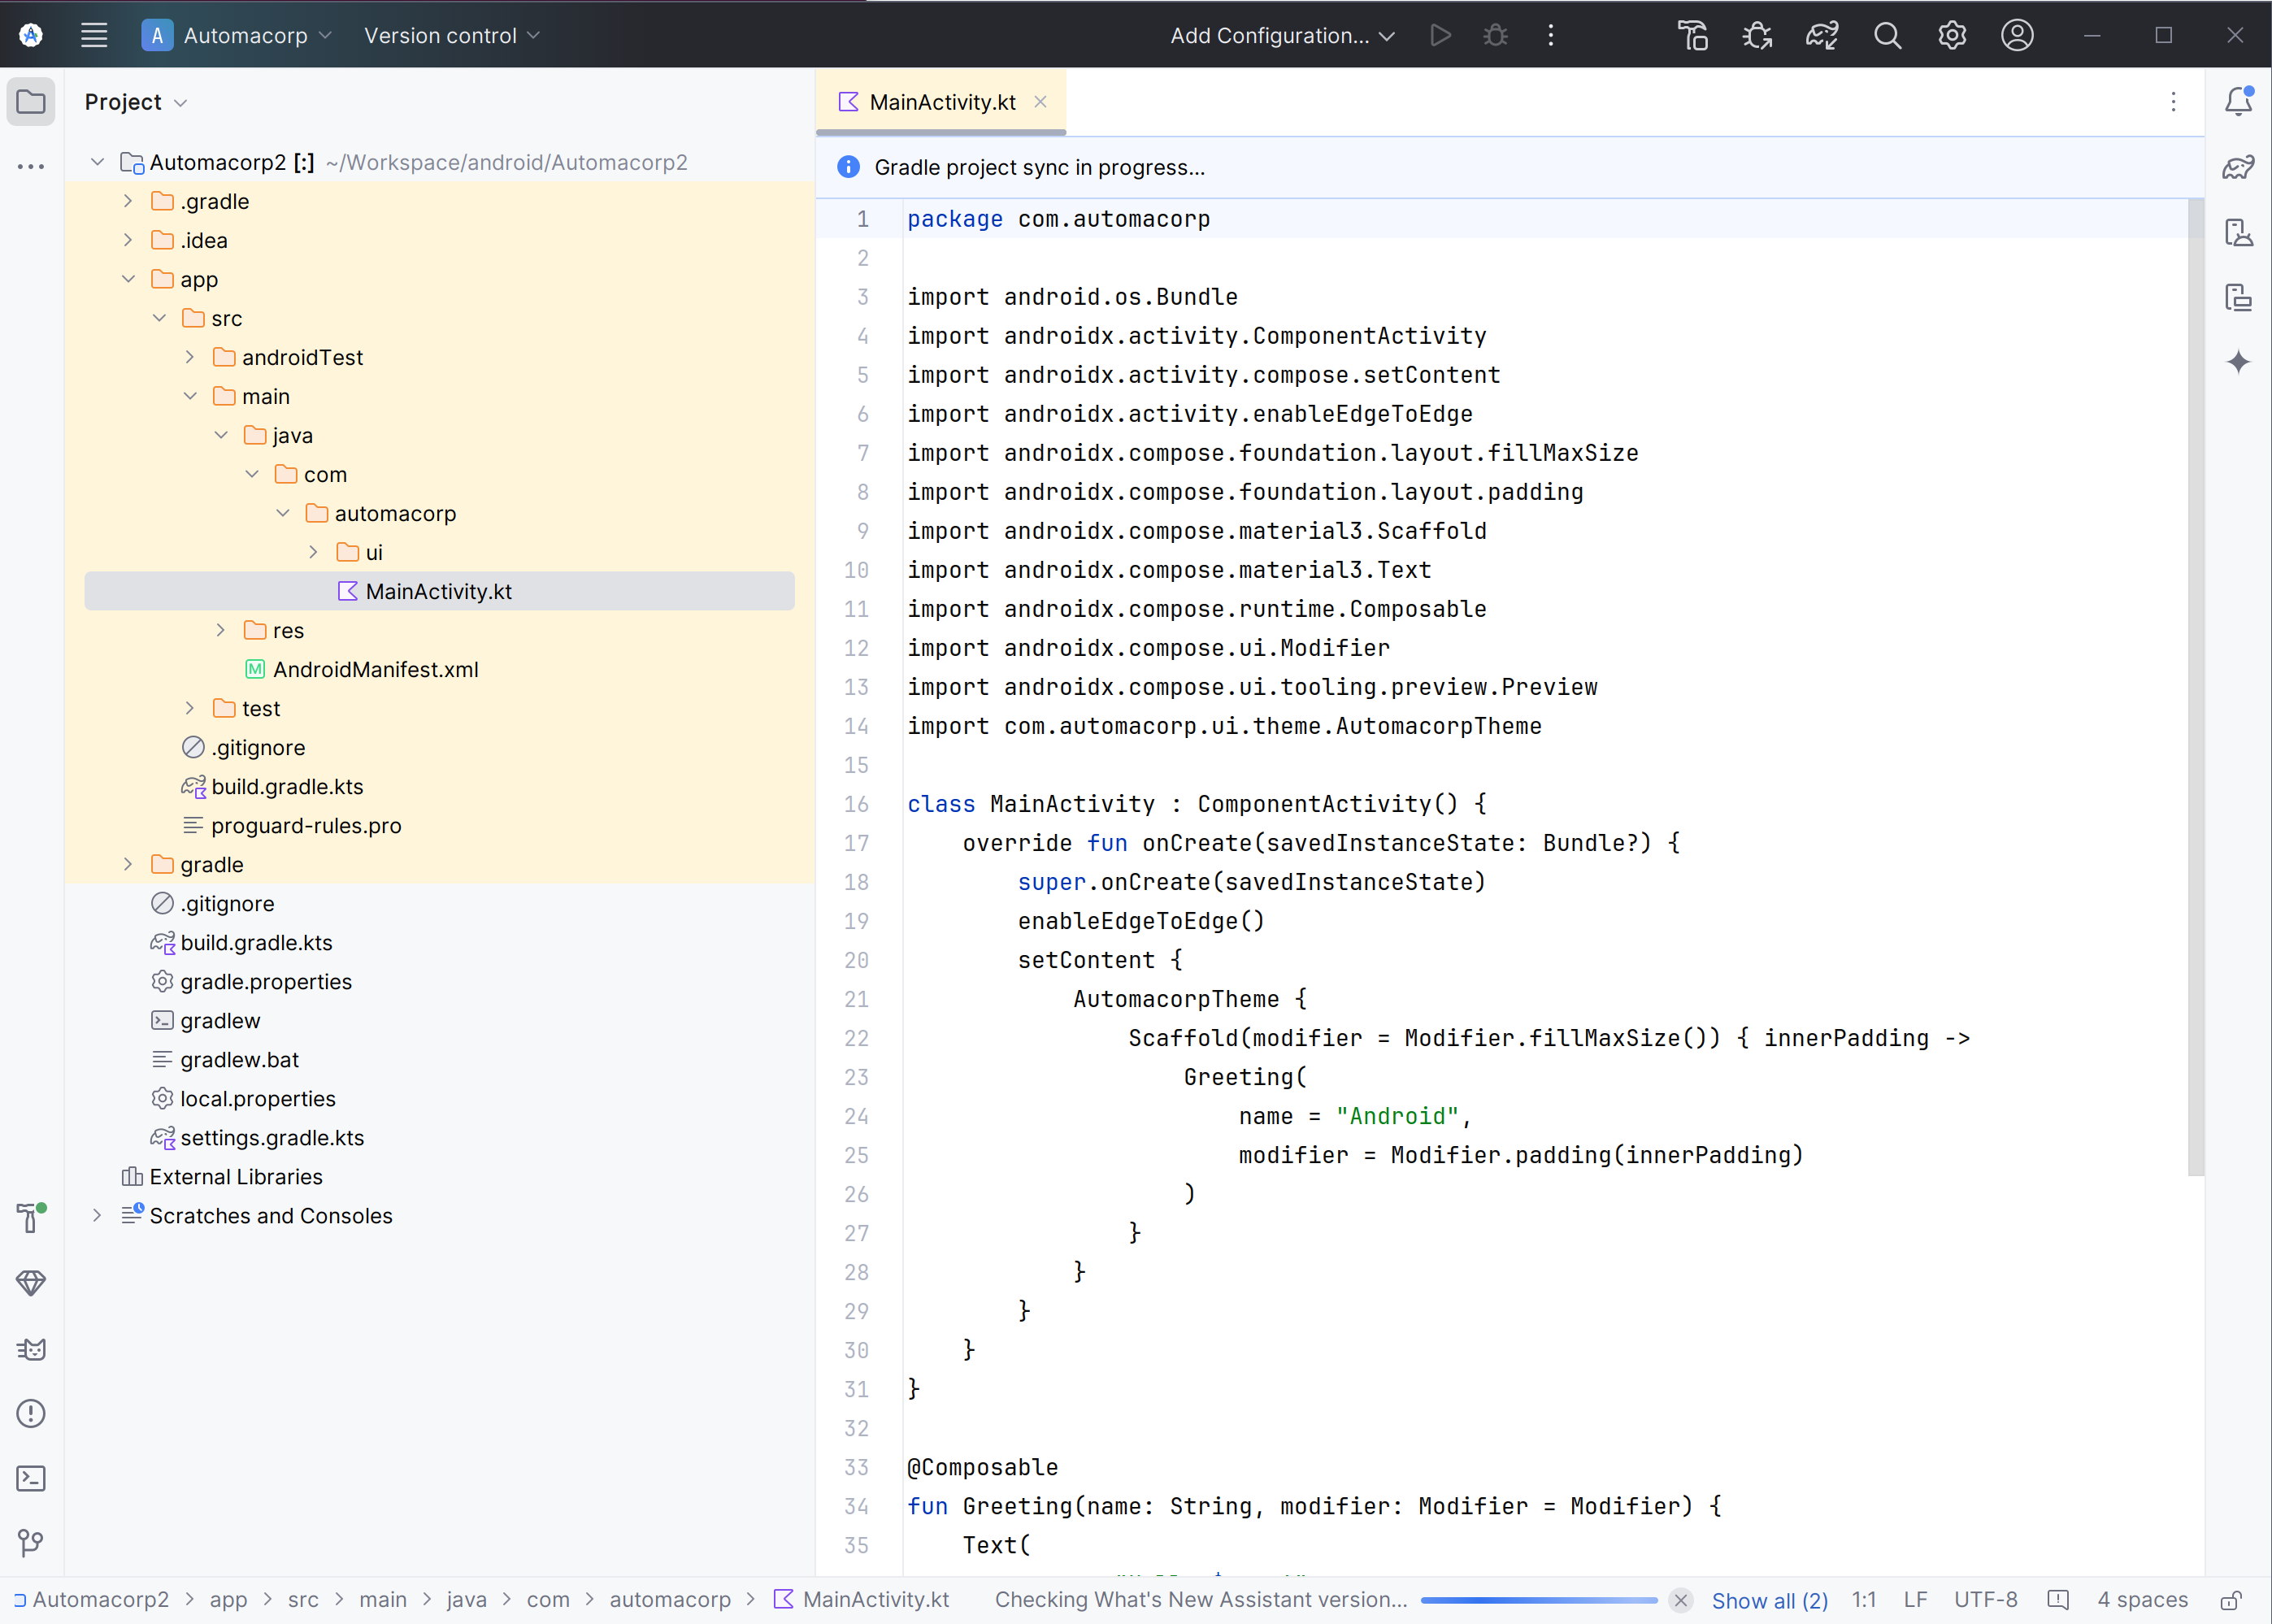
Most important files
Now take a moment to review the most important files. Android Studio is organized like IntelliJ, used during labs about Spring Framework. The core of these software are common and made by Jetbrains.
First, be sure the Project window is open (select View > Tool Windows > Project) and the Android view is selected from the drop-down list at the top of that window. This Android view let see you the main files of your Android project
Manifest file
File : app > manifests > AndroidManifest.xml
Manifest file is a kind of project id card.
The manifest file describes essential information about your app to the Android build tools, the Android operating system, and Google Play.
All activities must be defined inside and one of them will be defined as entry point for your app (with an intent filter).
<?xml version="1.0" encoding="utf-8"?>
<manifest xmlns:android="http://schemas.android.com/apk/res/android" xmlns:tools="http://schemas.android.com/tools">
<application android:allowbackup="true" android:dataextractionrules="@xml/data_extraction_rules" android:fullbackupcontent="@xml/backup_rules" android:icon="@mipmap/ic_launcher" android:label="@string/app_name" android:roundicon="@mipmap/ic_launcher_round" android:supportsrtl="true" android:theme="@style/Theme.Automacorp" tools:targetapi="31">
<activity android:name=".MainActivity" android:exported="true" android:label="@string/app_name" android:theme="@style/Theme.Automacorp">
<intent-filter>
<action android:name="android.intent.action.MAIN"></action>
<category android:name="android.intent.category.LAUNCHER"></category>
</intent-filter>
</activity>
</application>
</manifest>Activity
You can see 3 packages com.automacorp in Android view.
-
The first one (not suffixed) contains all your Kotlin files used to write your app and our first activity
-
The second (suffixed with androidTest) contains test files executed to test your app on a device or on an emulator.
-
The last one (suffixed with test) contains unit test files used to control your code locally at each build
Unfortunately we don’t have enough time to see how to write these tests during our labs.
But be aware that if you want to create a sustainable application, testing is the best way to limit regressions and make it easier to manage your application over time.
You can find more information about tests here.
File : app > java > com.automacorp > MainActivity
The code to create an activity
This is the main activity and it’s the entry point for your app.
When you build and run your app, the system launches an instance of this Activity and loads its layout.
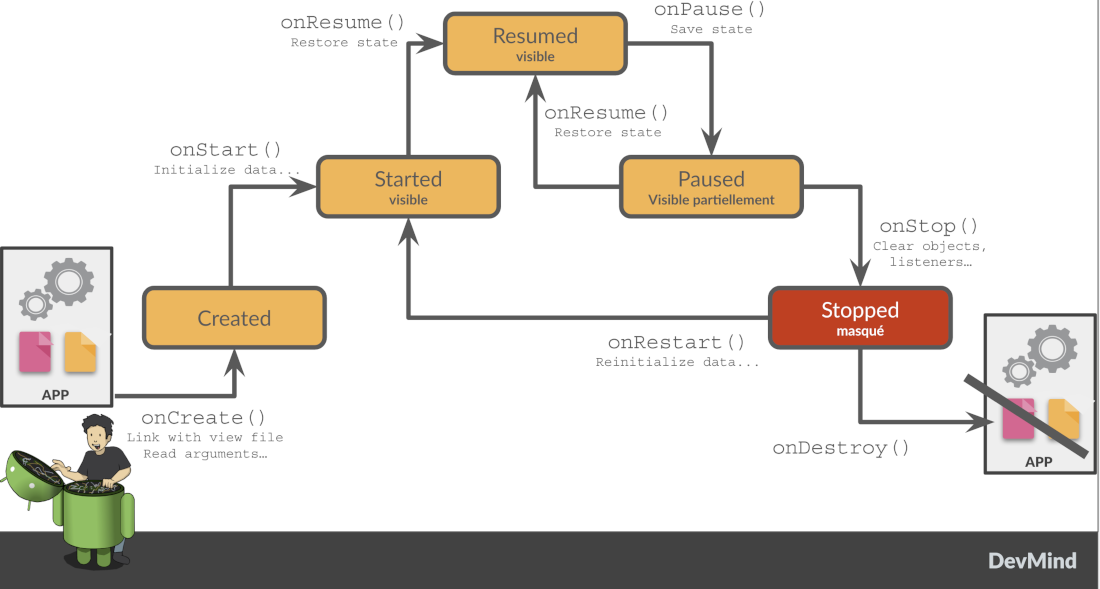
Each activity (as each components in Android) has a lifecyle and you can interact at each step (ie you can overload a method to add a behavior or some code in a lifecycle phase).
For example in MainActivity, the view is associated in the onCreate function. In this example the work is done in the setContent block. This block is used to declare which Jetpack Compose components will be used to create the view. We load a custom type (ie AutomacorpTheme) and a Scaffold component. The Scaffold component is a layout component that provides a material design layout structure for the screen.
class MainActivity : ComponentActivity() {
override fun onCreate(savedInstanceState: Bundle?) {
super.onCreate(savedInstanceState)
enableEdgeToEdge()
setContent {
AutomacorpTheme {
Scaffold(modifier = Modifier.fillMaxSize()) { innerPadding ->
Greeting(
name = "Android",
modifier = Modifier.padding(innerPadding)
)
}
}
}
}
}Jetpack component
Greeting is a composable function. A function composable has the @Composable annotation.
@Composable
fun Greeting(name: String, modifier: Modifier = Modifier) {
Text(text = "Hello $name!", modifier = modifier)
}A few noteworthy things about this function:
-
The function is annotated with the @Composable annotation. All Composable functions must have this annotation; this annotation informs the Compose compiler that this function is intended to convert data into UI.
-
The function takes in data. Composable functions can accept parameters, which allow the app logic to describe the UI. In this case, our widget accepts a String so it can greet the user by name.
-
The function displays text in the UI. It does so by calling the Text() composable function, which actually creates the text UI element. Composable functions emit UI hierarchy by calling other composable functions.
-
The function doesn’t return anything. Compose functions that emit UI do not need to return anything, because they describe the desired screen state instead of constructing UI widgets.
This function is fast, idempotent, and free of side-effects. The function describes the UI without any side-effects, such as modifying properties or global variables.
Preview the component
To test your app, you can run it on your phone or on an emulator. We will see that in the next chapter.
But you can write a simple function to be able to test a composable alone. The @Preview annotation lets you preview your composable functions within Android Studio without having to build and install the app to an Android device or emulator. The annotation must be used on a composable function that does not take in parameters.
@Preview(showBackground = true)
@Composable
fun GreetingPreview() {
AutomacorpTheme {
Greeting("Android")
}
}You can choose to display the design view at the right of your code editor with the button at the top right of the editor.

![]() Code View
Code View
![]() Code And Design View
Code And Design View
![]() Design View
Design View
Resource files
Resources are the additional files and static content that your code uses, such as images, screen definitions, strings used in interfaces, styles, animation instructions, and more.
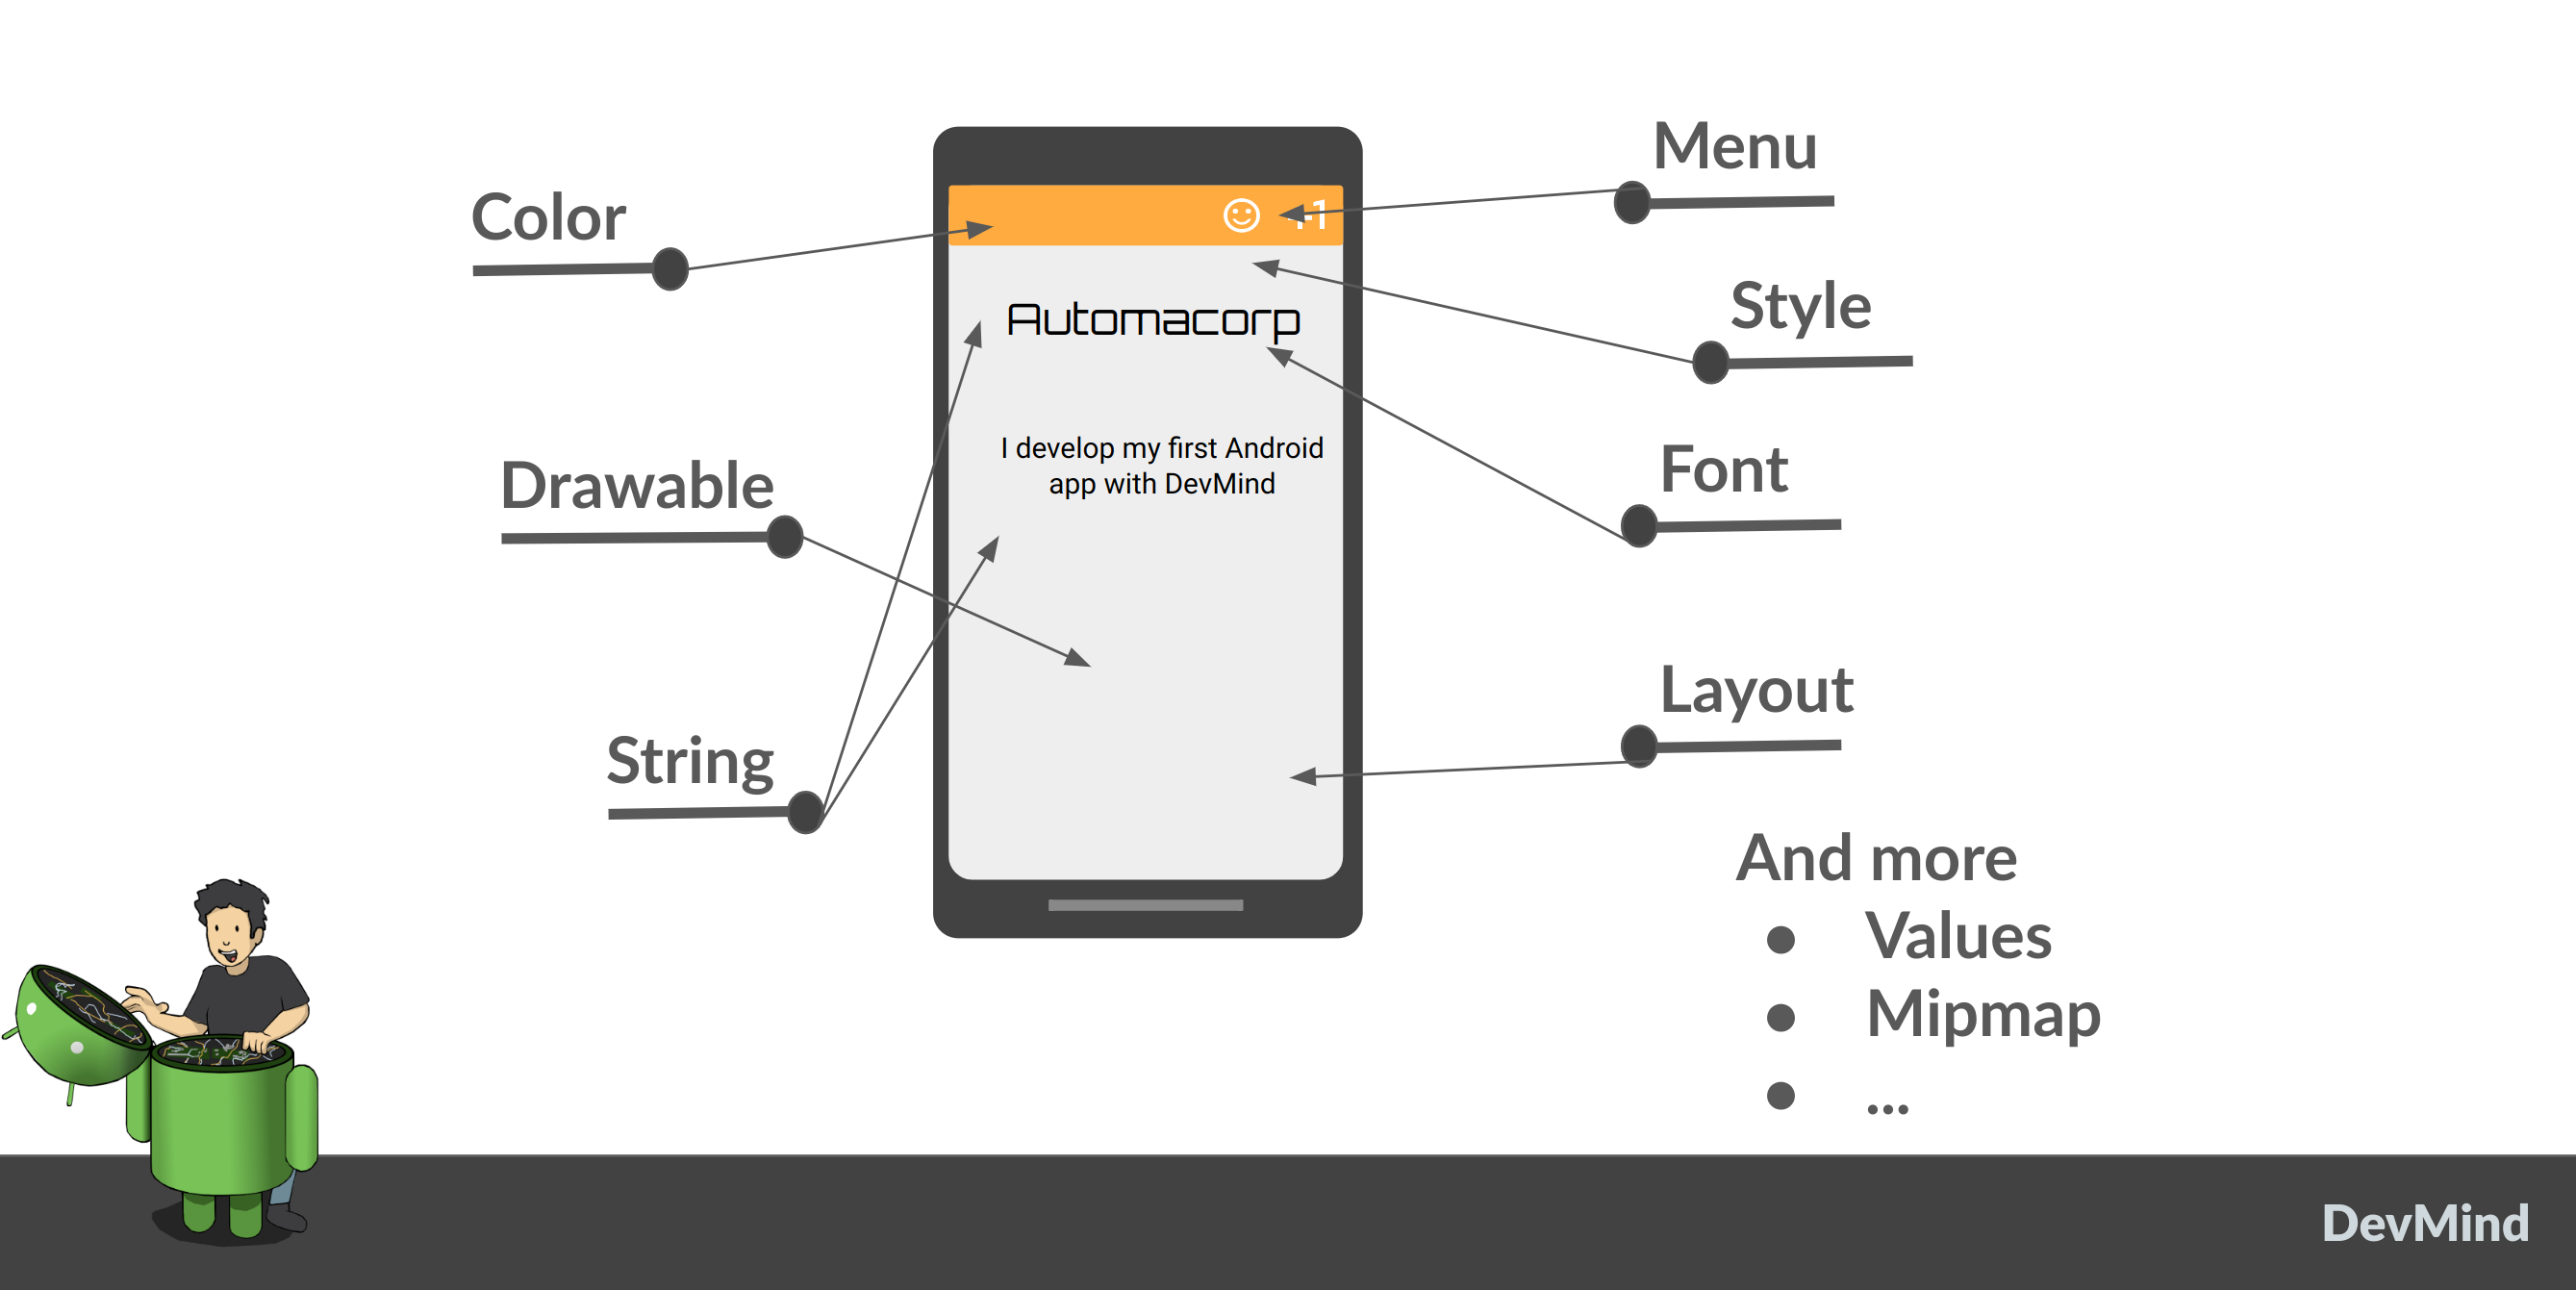
You can provide alternative resources for specific device configurations, by grouping them in specially-named resource directories.
At runtime, Android uses the appropriate resource based on the current configuration.
For example, you might want to provide a different UI layout depending on the screen size or different strings depending on user language. In this case you will have a default file app/src/main/res/values/string.xml and a specific file for France app/src/main/res/values-fr/string.xml
Gradle file
File : Gradle Scripts > build.gradle.kts
There are two files with this name:
-
one for the project, Project: automacorp, and
-
one for the app module, Module: app
Each module has its own build.gradle.kts file, but this first project currently has just one module.
If you need to use external libraries you can, and you need to declare them in build.gradle.kts (Module: app).
You can also configure the android plugin (APi version, SDK version).The defaultConfig block is important. This is where you have to define
-
the min sdk used by the phone that uses your app
-
the target sdk used for the compilation. It’s important to use the highest value
-
your code version and the version name. If you need to publish your app on the Google store this number must be incremented at each release.
android {
namespace = "com.automacorp"
compileSdk = 34
defaultConfig {
applicationId = "com.automacorp"
minSdk = 31
targetSdk = 34
versionCode = 1
versionName = "1.0"
testInstrumentationRunner = "androidx.test.runner.AndroidJUnitRunner"
vectorDrawables {
useSupportLibrary = true
}
}
buildTypes {
release {
isMinifyEnabled = false
proguardFiles(
getDefaultProguardFile("proguard-android-optimize.txt"),
"proguard-rules.pro"
)
}
}
compileOptions {
sourceCompatibility = JavaVersion.VERSION_1_8
targetCompatibility = JavaVersion.VERSION_1_8
}
kotlinOptions {
jvmTarget = "1.8"
}
buildFeatures {
compose = true
}
composeOptions {
kotlinCompilerExtensionVersion = "1.5.1"
}
packaging {
resources {
excludes += "/META-INF/{AL2.0,LGPL2.1}"
}
}
} : Launch your application
In this part you will be able to launch your application on you phone or tablet. If you don’t have a device on Android operating system, you can use the emulator embedded in Android Studio.
Configure a real Android device
You need to set up your phone
-
Connect your device to your development machine with a USB cable. If you developed on Windows, you might need to install USB driver for your device.
-
You need to update your device to activate "Developer options"
-
Open the Settings app on your device
-
Select item About phone.
-
Go to the bottom to Build number item
-
Tap on this Build number seven times. You should see a message which says that you are now a developer.
-
If you go back on Settings app and in System section you should see a new entry Developer options
-
Tap on Developer options and scroll down to find and enable USB debugging.
-
Since few versions of Android, you can also pair your phone via your Wifi connection. Your laptop and your phone must use the same Wifi.
-
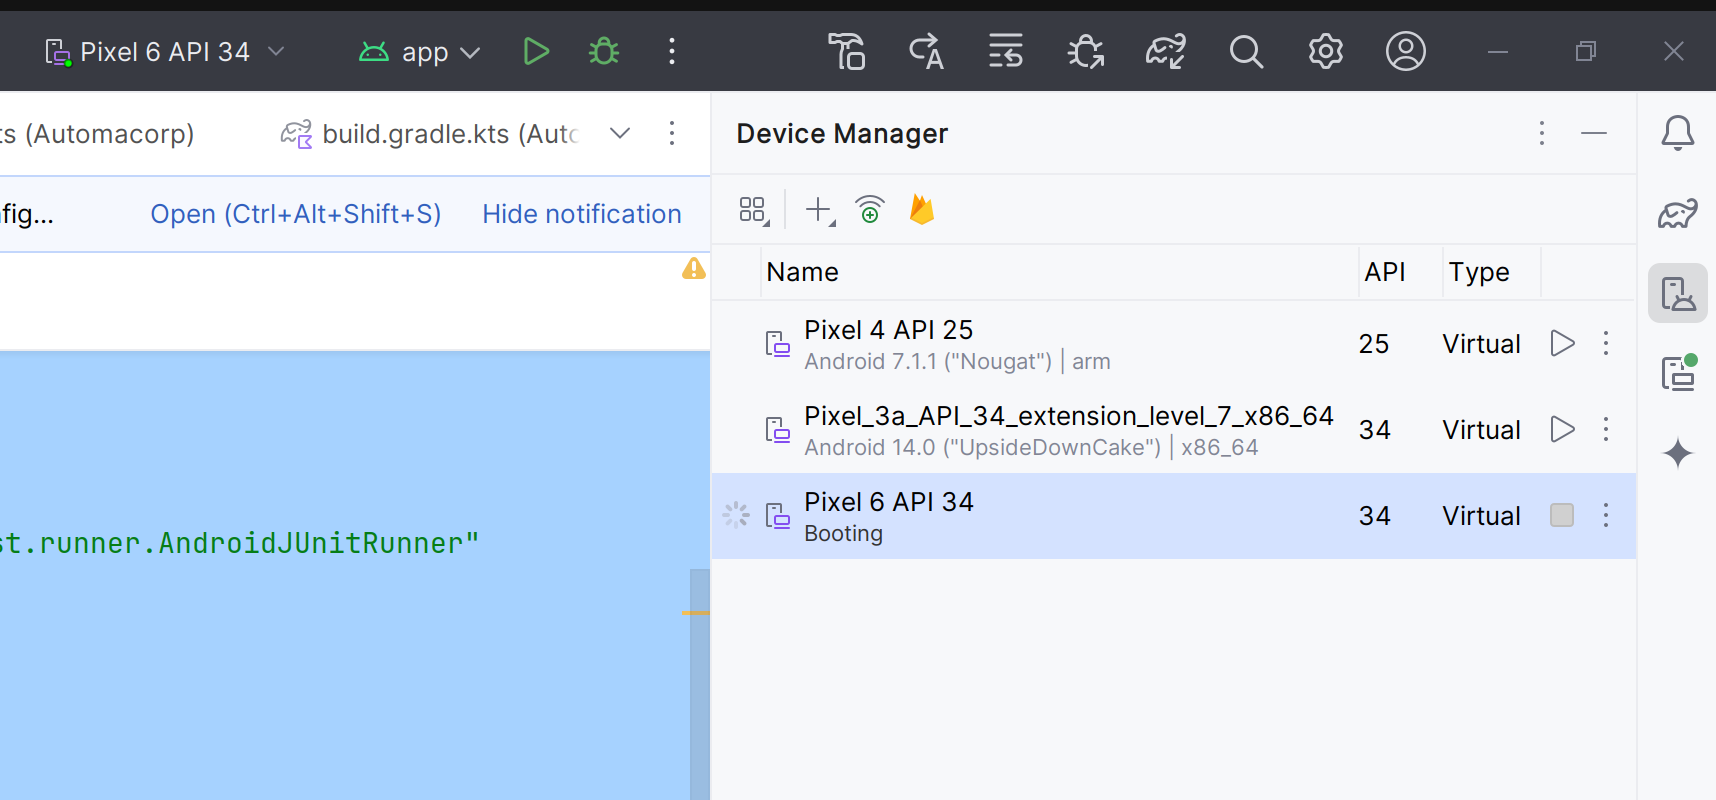
On Android Studio, open the running devices window (with the button on the right of the UI).
-
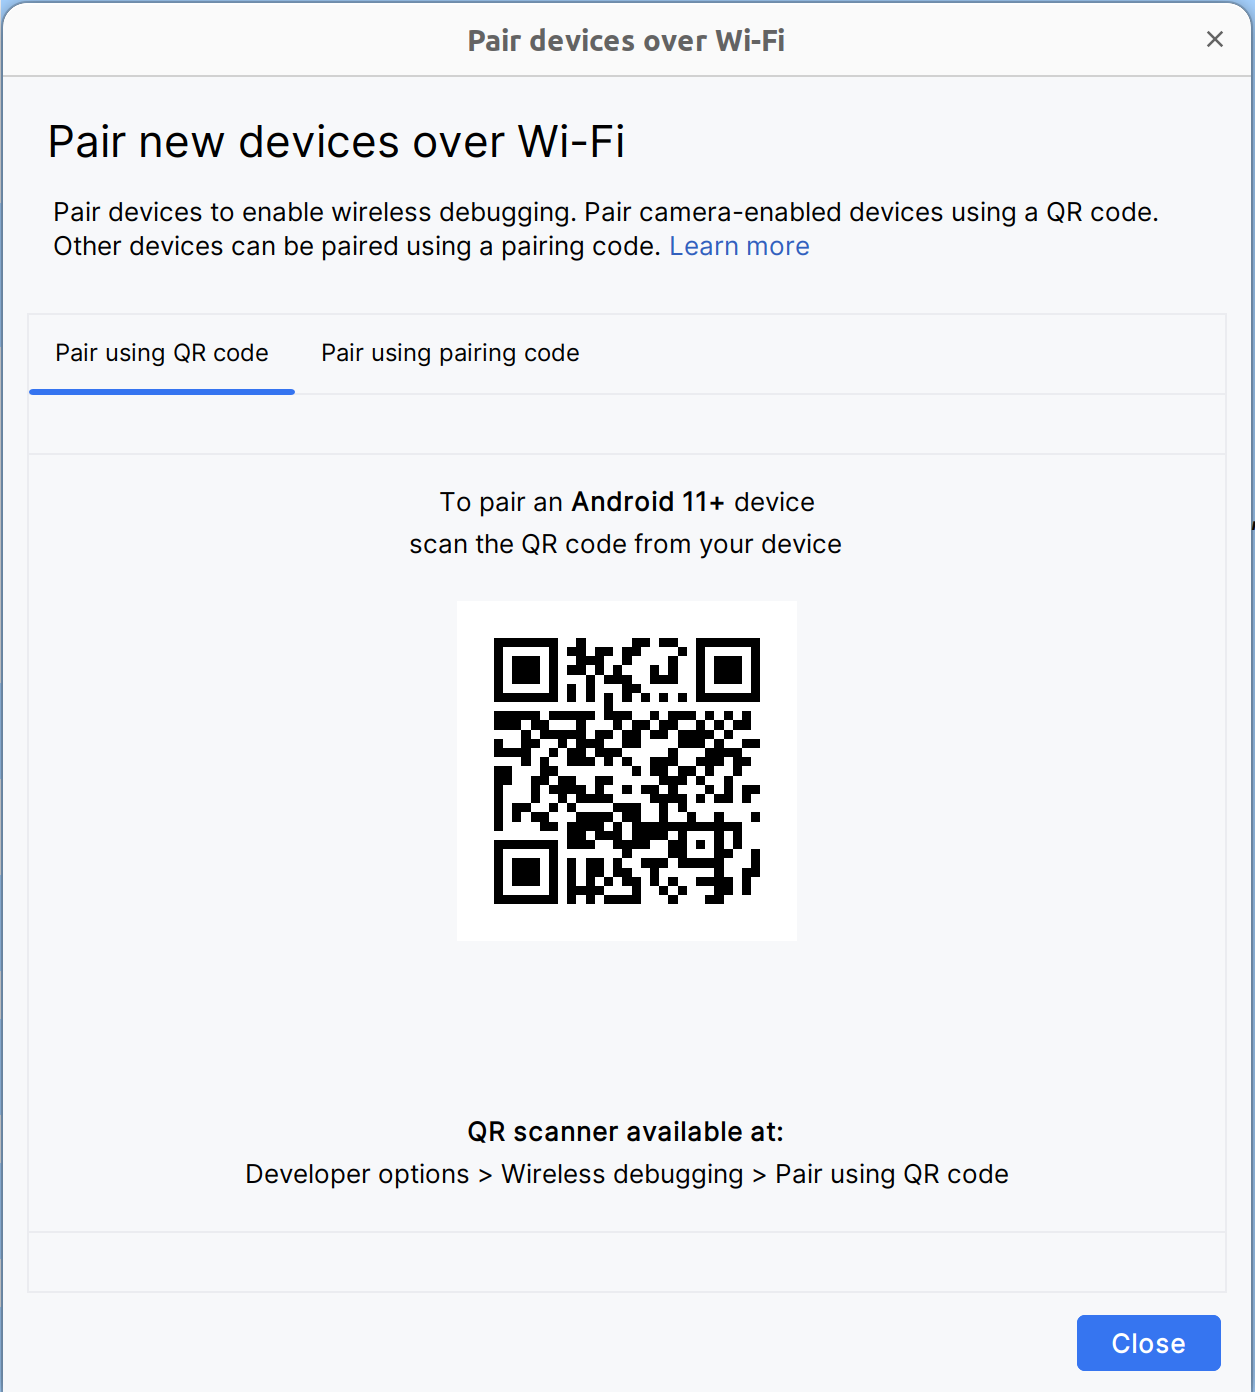
Select in the toolbar the button Pair devices using Wifi

-
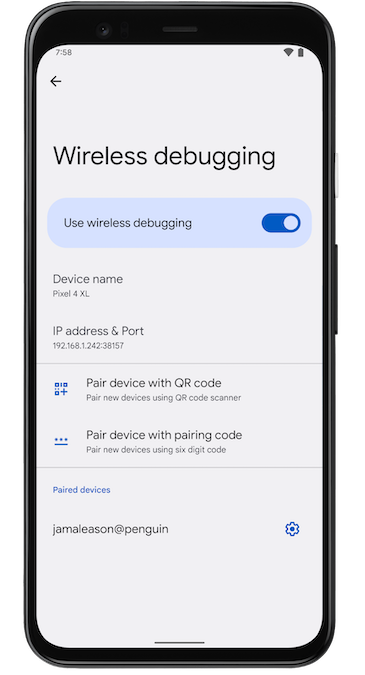
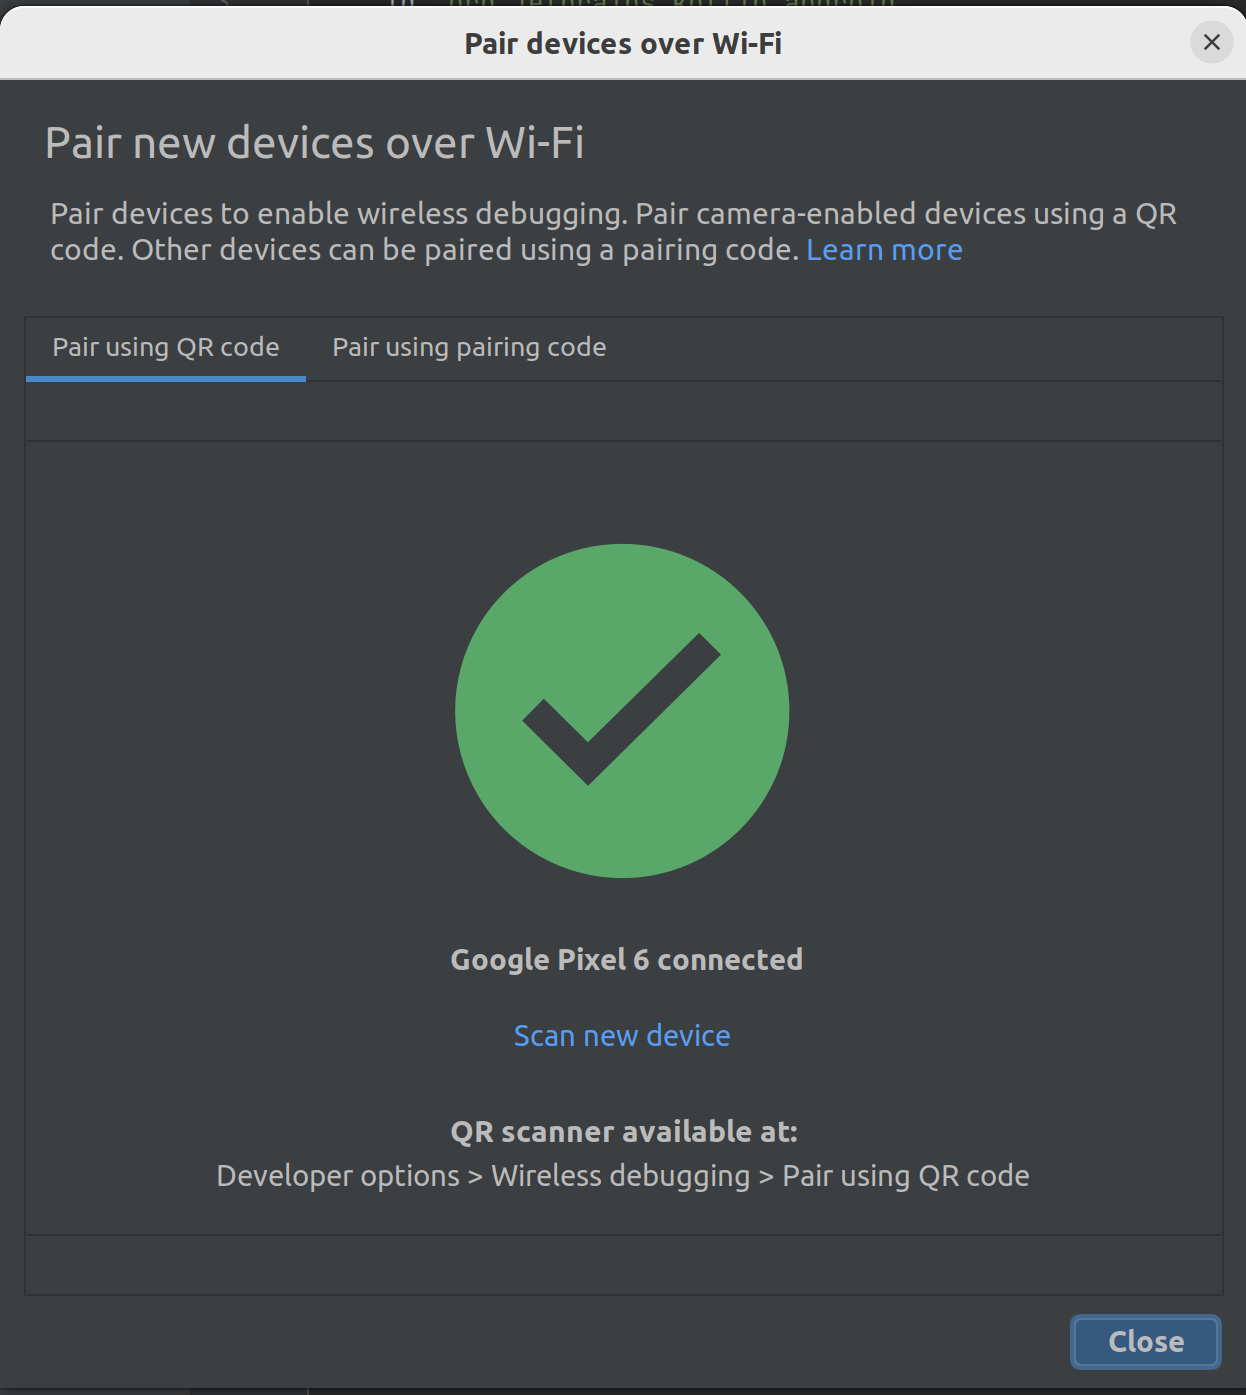
On your phone, in Developer options, select Wireless debugging and Pair using QR code and scan the QR code. If everything is OK you should see. To work you should set the same Wifi on your laptop and on your mobile.
-
When you are connected you should see your device in the running devices window
Now you are ready to run your app
Configure a virtual device
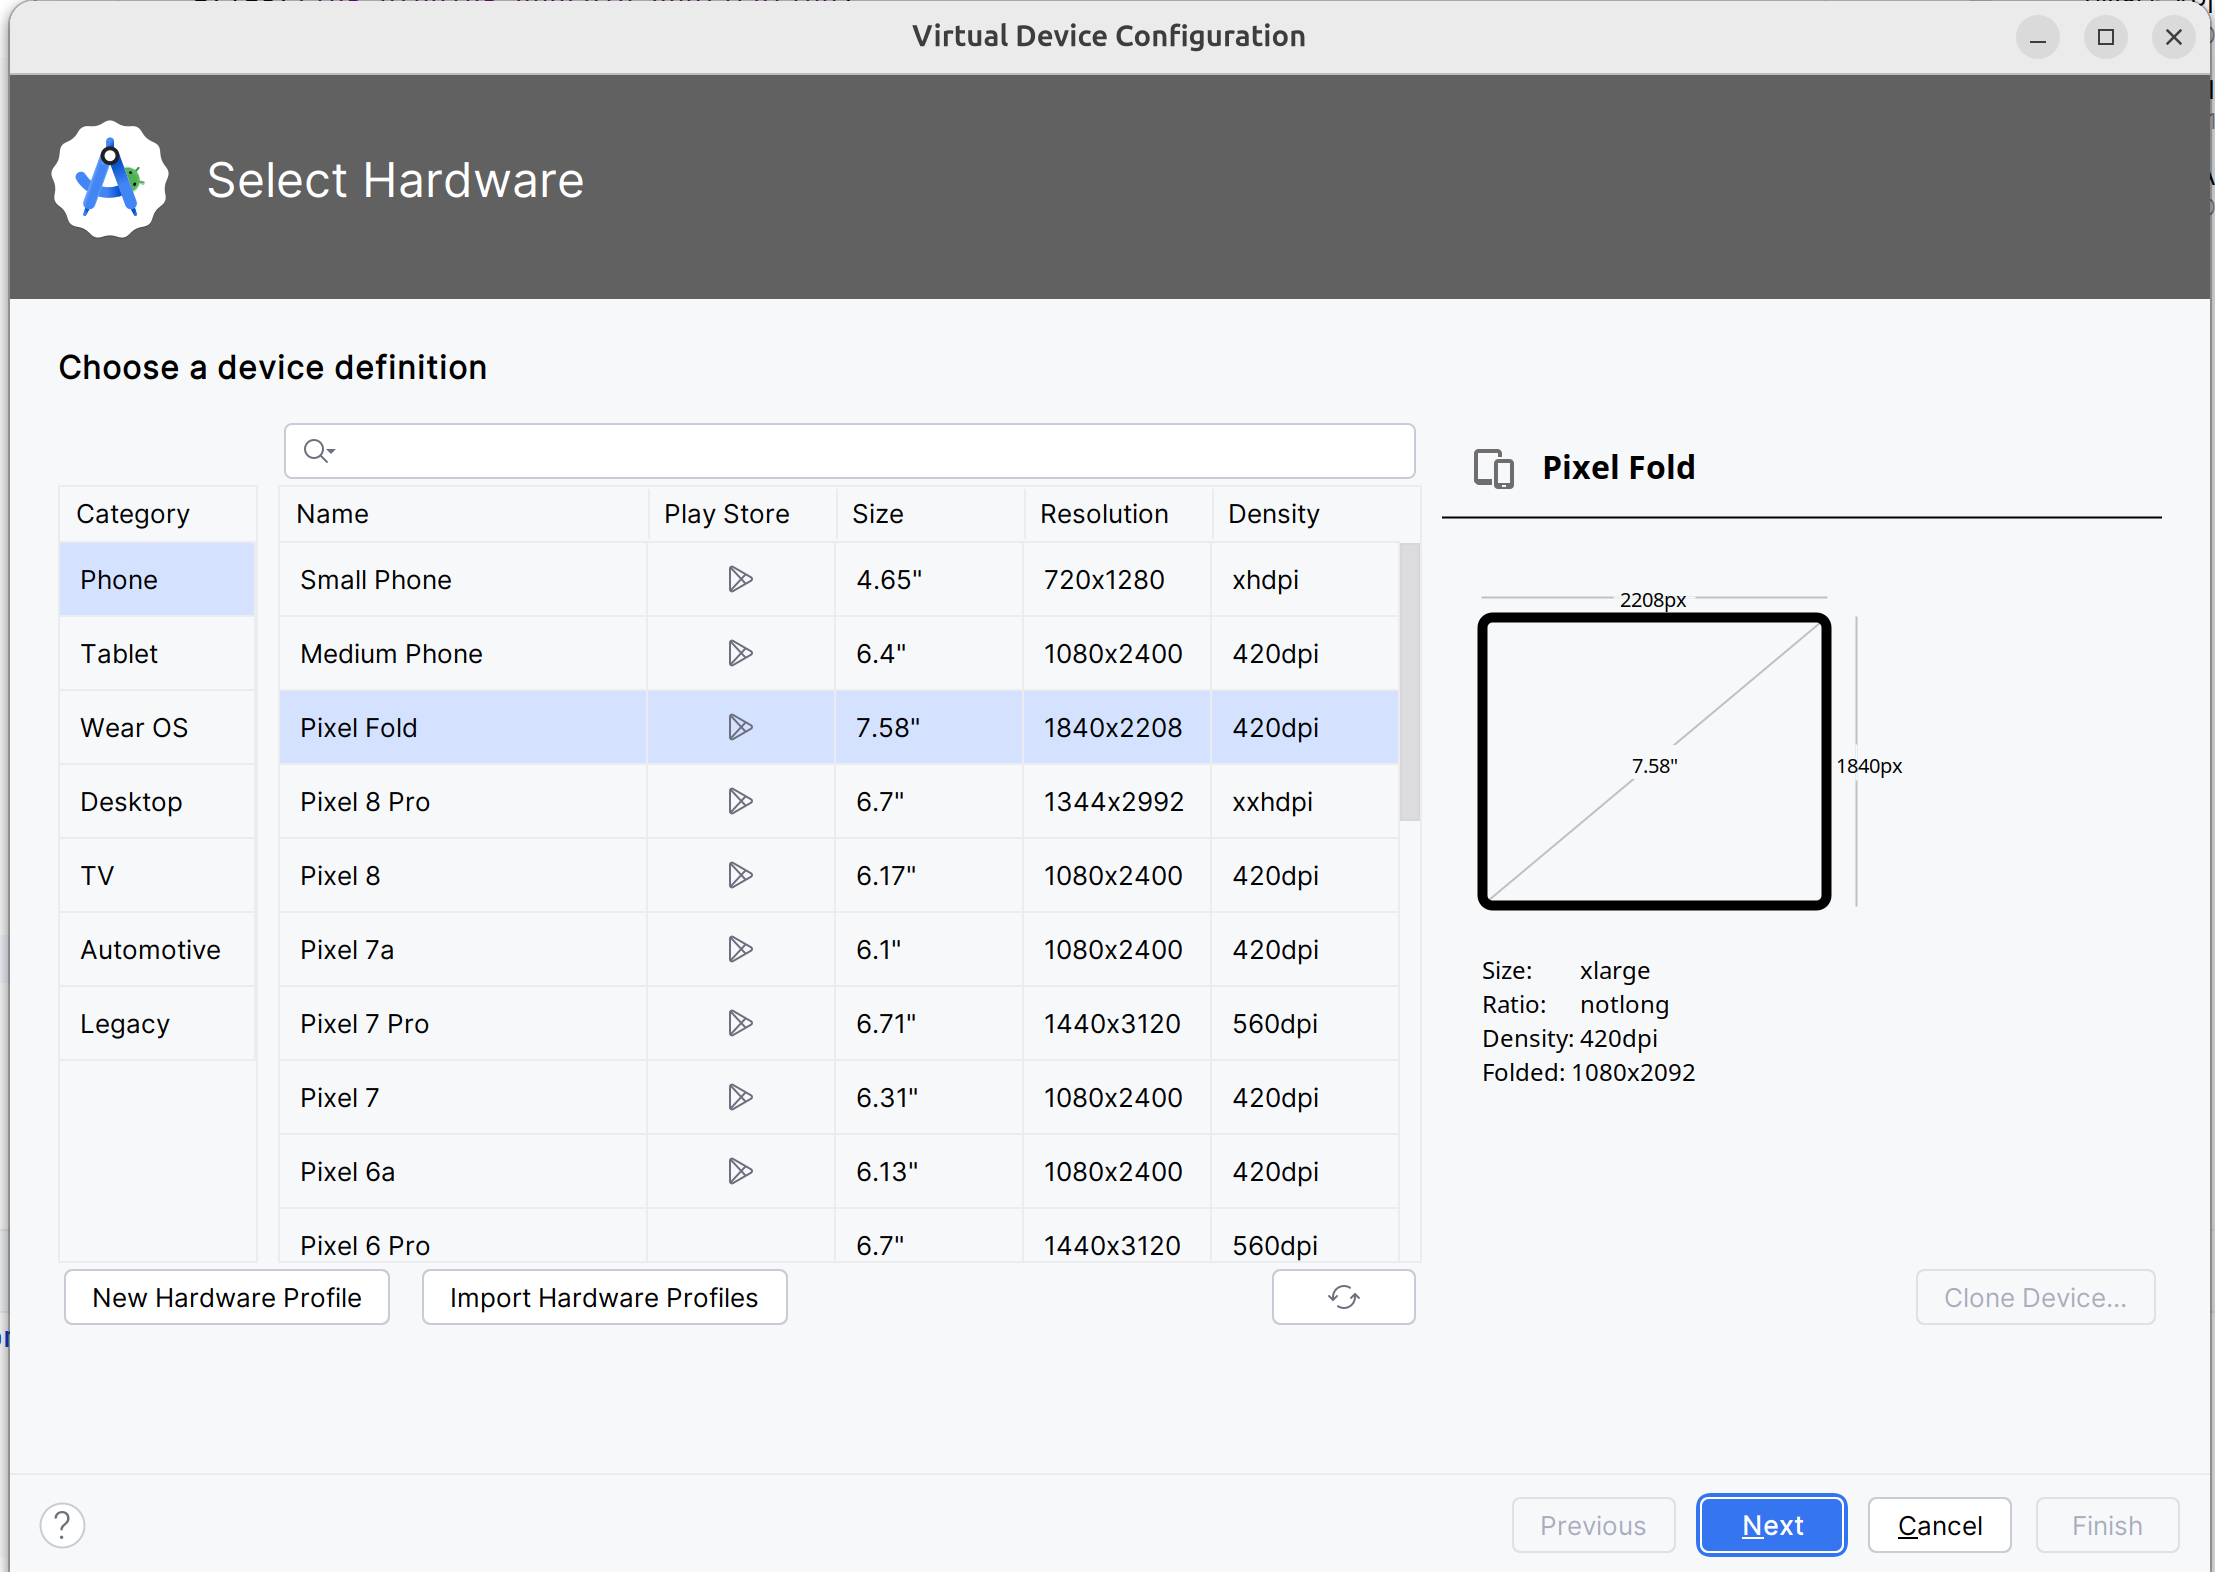
When you install Android Studio the first time, an AVD (Android Virtual Device) is also installed to simulate a phone. A virtual device is a configuration that defines the characteristics of an Android phone, tablet, Wear OS, Android TV, or Automotive OS device. It’s very useful to test an app for every kind of device.
You can add, update or delete your virtual devices on the AVD. Open menu Select Tools > Device Manager.. You can also access this window through a side tab.

If you click on the + button, at the top of the AVD Manager dialog you will be able to create a device. You can choose device type (TV, phone, auto…), its configuration (OS version, density, size…) The Select Hardware page appears.
For more informations you can read this article
Run your app
Everything is now ready to test your project.
-
In toolbar, select your app from the run/debug configurations drop-down menu.
-
From the target device drop-down menu, select the AVD or the device, that you want to run your app on.
-
Click on Run button

If everything is OK you should see your first app. It is very simple and not very pretty but we do better in the next chapter
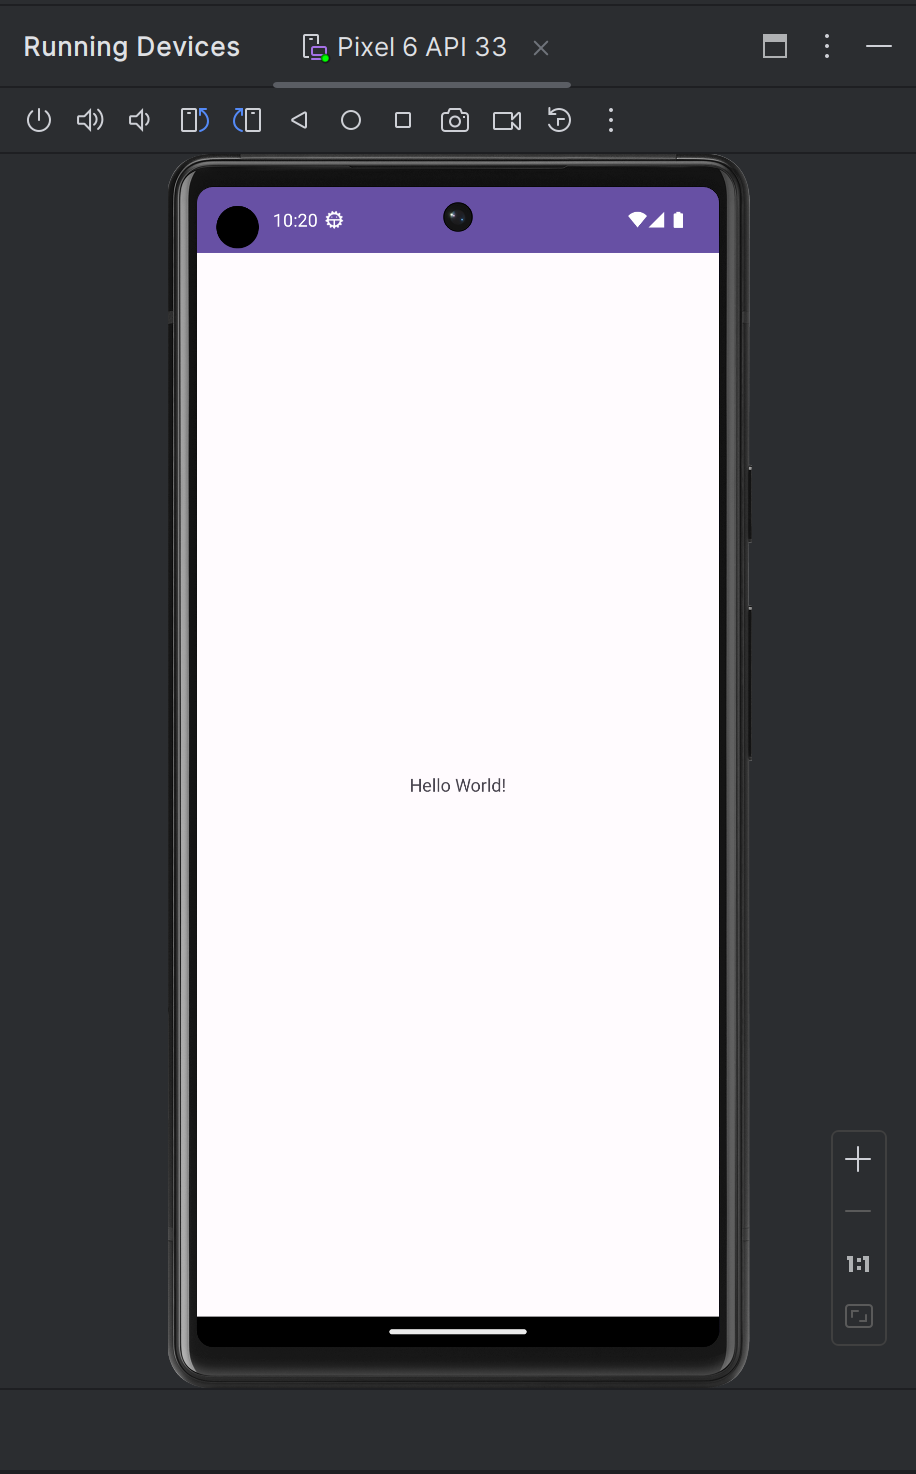
To analyze errors you can open the Logcat view to see logs send by your device or the emulated device

Resources
About Android you can read
-
Android developer website : you will find all resources about Android.
-
Codelabs : you can find more detailed examples in these codelabs created by Google training team
You can find resources on Kotlin
-
Kotlin and android : my blog post is in French but it explains why Google prefers today Kotlin to Java
-
Learn Kotlin by examples : you can read documentation and test your code online
-
Official website documentation about this language
-
Google developpers site for kotlin: several resources on how use Kotlin to create an Android application